
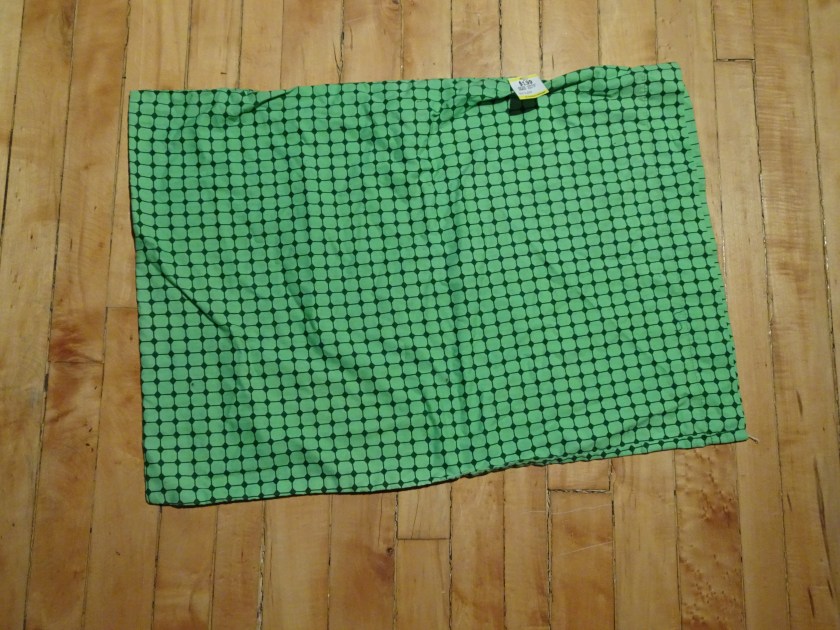
This is a pillowcase that I bought at the Bloor/Lansdowne Value Village in the autumn of 2018 for $1.99. I liked the print, liked the price, and liked the idea of adding more green to my wardrobe (currently underrepresented). For a while now I’ve been wanting to do some pattern-drafting to make some sleeveless tops anyway, so this provides a good excuse. Let’s do it!
I take the thing apart and iron it. The label said it was cotton, but I’m…not convinced. Under the iron it acts as if it contains a fair bit of polyester, possibly at a rate of 100%. (You also see this kind of thing with yarn – acrylic gets either mislabelled or intentionally disguised as something less synthetic.) No matter, though. I didn’t spend enough money here to want to complain.
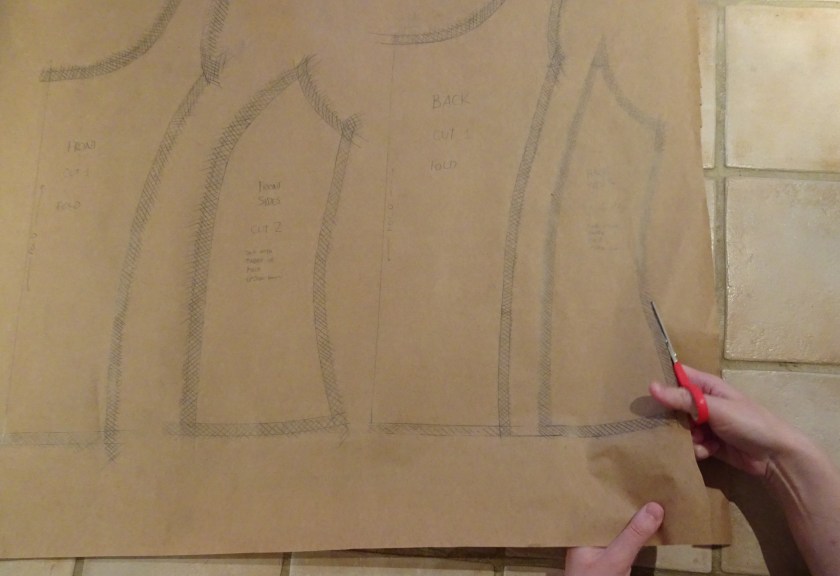
Pattern drafting! We begin with the fact that I like princess seams a lot, and darts not a lot. I dig around in my closet and find this top, which fits me well.

The outer layer is made of some kind of high-end polyester with a moderate amount of stretch along both axes, but the decidedly unstretchy polyester lining keeps it from going anywhere.
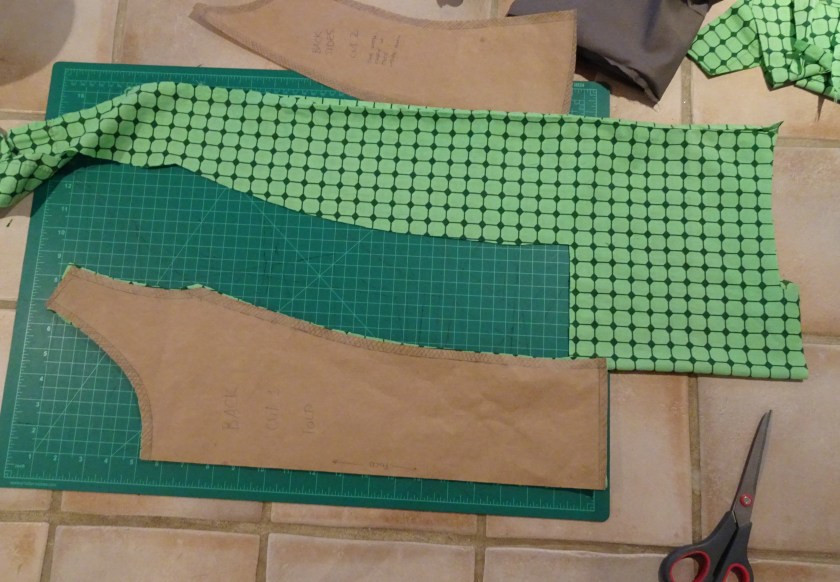
By this point, I have outgrown the newspaper stage and invested in some craft-paper. Newspaper is cheaper, but is harder to make pencil and eraser work on. Plus, it sometimes leaves ink everywhere, and the pieces end up looking so very temporary that I always end up mistakenly putting them in the recycling. I’d like to start building a set of reusable patterns to be used/adapted for clothes I make for myself.
Tracing! Some credit here is due to coolirpa’s tutorial, which helps me get started.

Because basically all of these lines are curved, I end up spending several evenings on this, repeatedly making adjustments. The flip-side will be not having to figure out dart insertion. Did I mention how much I like princess seams?
The hardest thing is figuring out where the two fold lines should be, until it occurs to me to cut the piece out generously, then fold the original top over, and compare the piece to it. Which works!
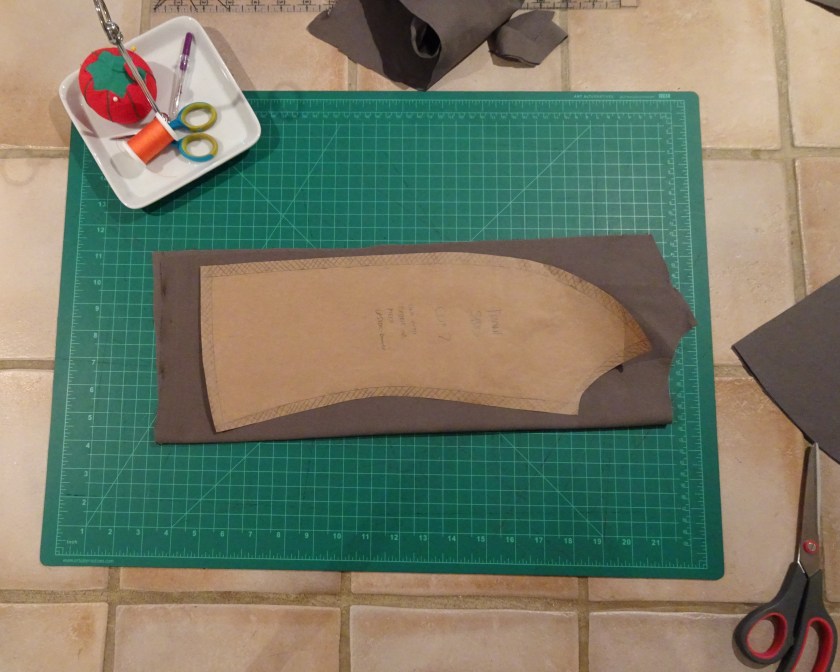
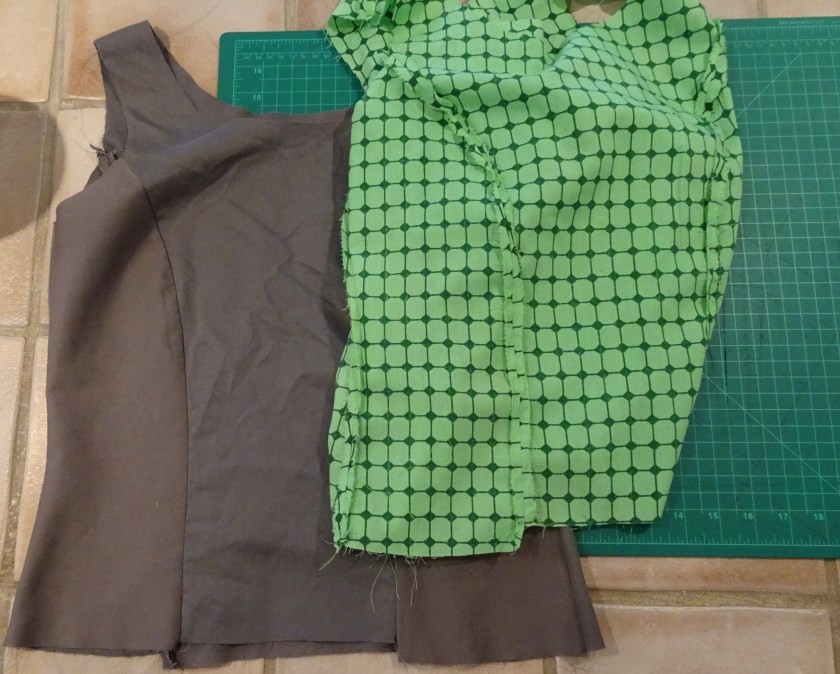
Time for a toile version out of that grey cotton from the moderately worn-out sheets I got for nothing from a friend who moved in 2018.
Cutting out pieces…
…sewing seams…

…shoulder seams and side seams…

I try it on in front of the mirror. Success! The only adjustment necessary is that the straps are slightly too long. I adjust them, and the pattern pieces, accordingly.
I had already decided that I wanted to line this thing (even if nothing else, I don’t think I quite have enough pillowcase fabric to finish all of the edges with binding strips), so I decide that the toile version is going to be the lining! I go ahead and clean up and finish the seams.
Now for the fun part: the outer layer. Can I fit all the pieces onto the fabric I have? Each half of the pillowcase, folded once, gets two.
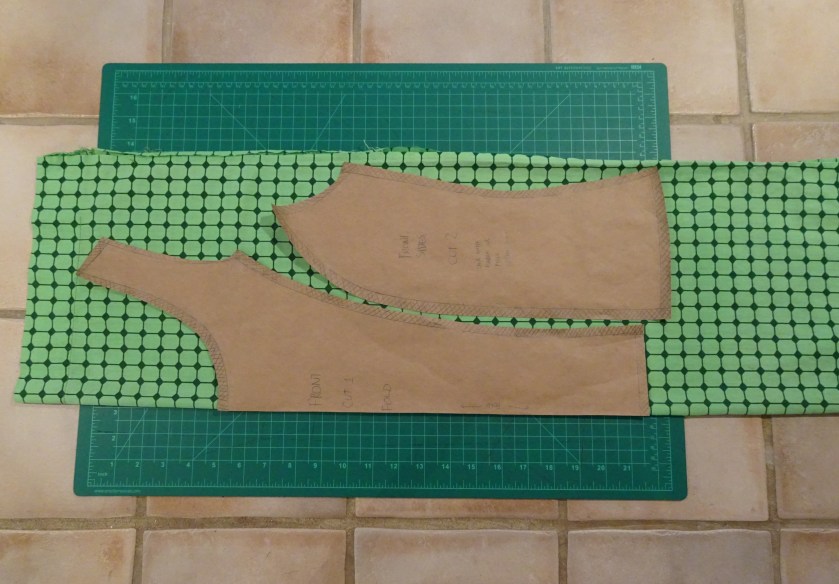
Okay, good. I’m not even going to try to worry about positioning here (i.e. trying to line up any part of the grid along a princess seam!) beyond the basic nap. Not enough fabric to bother. I cut all the pieces out very slightly larger than the pattern pieces in every direction just in case that helps hide the lining, but otherwise leave it the same.
Onwards to assembly.

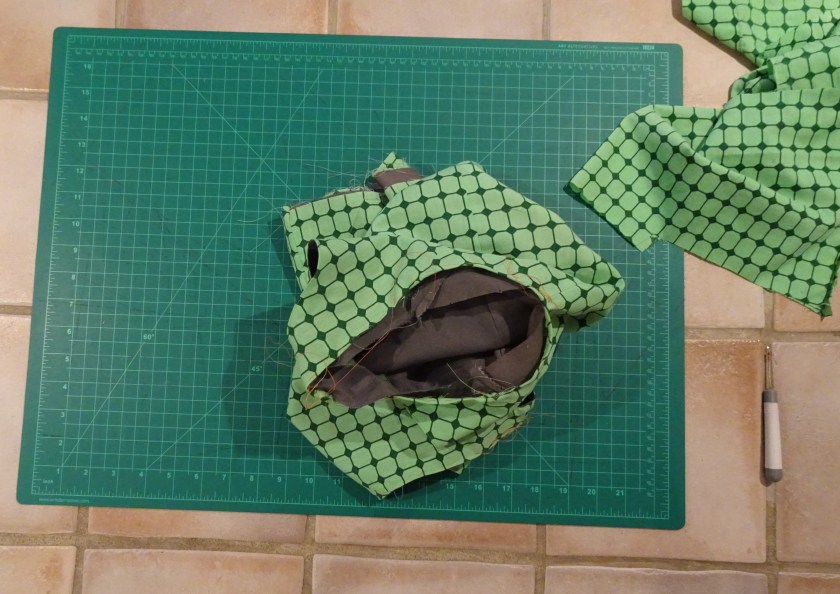
The lining will need to have right sides to the interior once this thing is done. Outer piece needs to have right sides facing outwards. That means the right sides are up against each other, and I sew them together wrong-sides outwards. This should be pretty straightforward, shouldn’t it?
It should, yes. In practice, not so much. I sew the lining to the outer layer at the shoulders, then remove it because I discover that the right sides weren’t facing each other. I fold everything inside out and baste around the neckline and then have to redo it because I discover that the right sides weren’t facing each other. I unfold each piece individually, put them back against each other, do it a third time, and discover that this time, the right sides still weren’t facing each other.
A bit of an unintentional farce. I pause, take each piece individually, double-check both, wait, double-check again, then dive in and make a fourth attempt. This one, uniquely, proves to be correct.
I quickly baste the neckline, then sew it at 3/8″, then fold inside out. I was going to press and topstitch, but I decide I want to be more precise, so another round of basting to make sure the outer layer is very slightly overhanging the lining, and then topstitching around narrowly (1/16″).
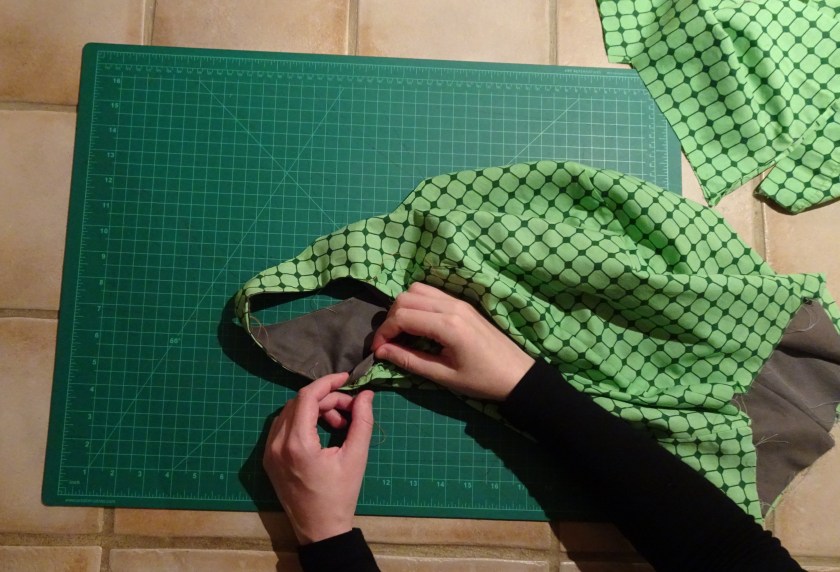
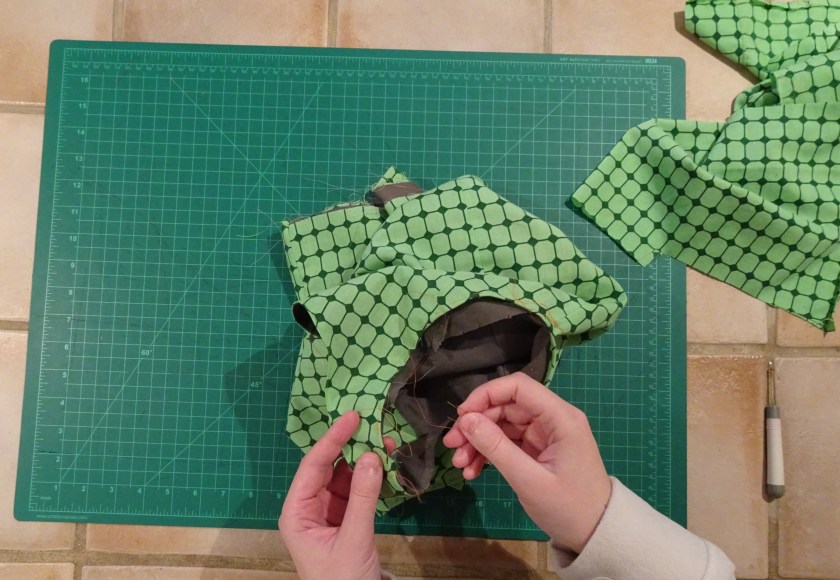
Now I’m trying to figure out the topology of finishing the armscyes given that I’ve made a lining separately.
I can’t sew them in on the wrong side, or there will be no way of pulling this top through itself back to the right side. I could undo the side seams or the shoulders, but I don’t think either of these would actually solve the problem – and then I’d be up against the additional task of finishing the shoulders from the right side.
I consider but don’t come up with anything offhand. Clearly this is mathematically possible, given that I have tops with linings that aren’t showing any of the seams. I finally ask Google how to do a full lining of a bodice and learn that there is a method of cleverly configuring everything such that the entire top is ready to be yanked through the strap the instant a single armhole is done. The problem is that what I’m working with is too bulky for that given smallish straps.
Finally I decide that since my idiosyncratic tendency is to baste all the things, I could get through this little puzzle via Strategic Folding from the right side of the work, as follows:
1. Clip the curves proactively, but without making the cuts too deep.
2. Fold outer layer inwards along the edge by about 1/4″ and baste all the way around
3. Fold lining outwards along the edge also by about 1/4″ and anchor it to the outer layer at the top and the bottom with a bunch of temporary stitches in both places
4. Baste around the front and back halves to hold the layers together with the armhole dimensions evenly distributed
5. Topstitch at 1/16″ from the edge.
There are two big disadvantages of this method in general:
1. It’s painstaking. Finicky, even. However, I’ve done worse when it comes to going around a raw edge a gazillion times to force something to work from the right side.
2. It’s not as secure as having a real seam in there would be. That said, these are armholes. They’re not going to be under much strain.
I decide I’m going for it.
One of the armholes turns out well on the first try.
The other one is awkward – the lining and the outer fabric feel misaligned. I rip it out and try it again.
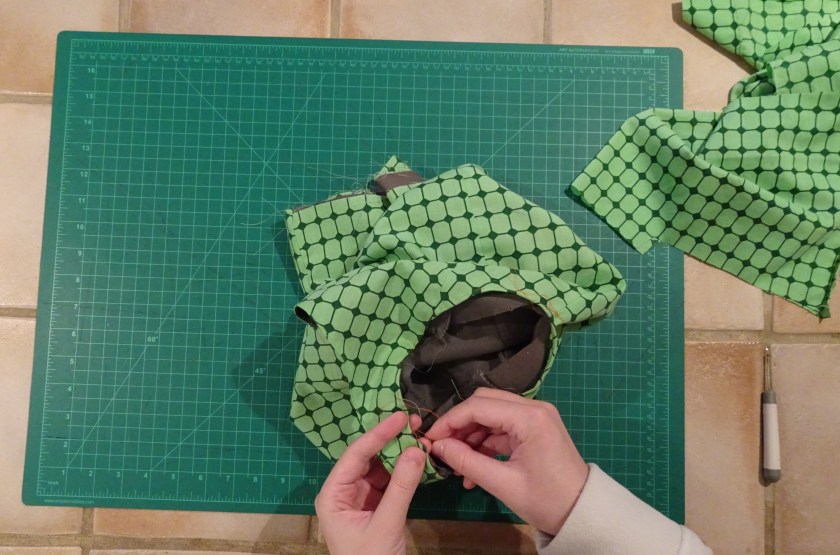
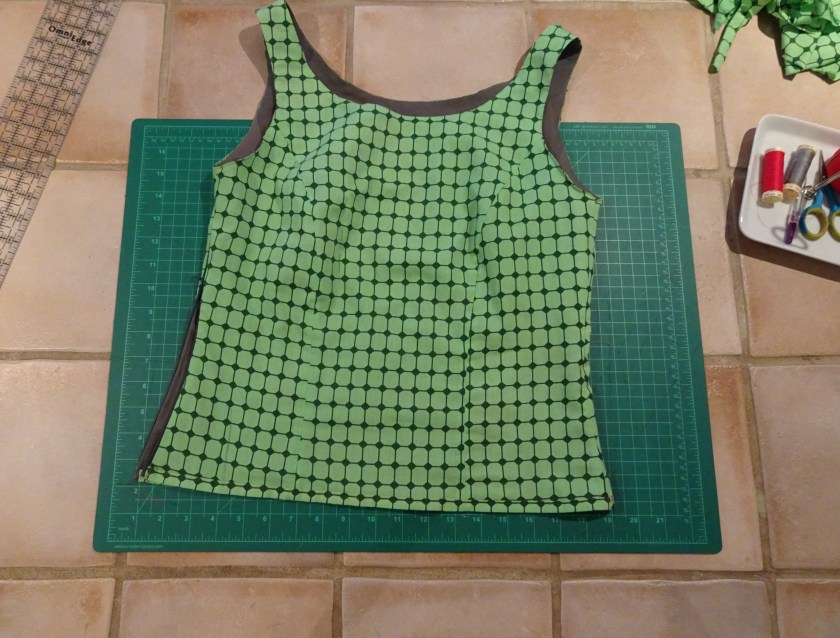
Okay, the basting is decent. Then I iron both armholes down and topstitch at 1/16″. The only problem is that this distance is a little too narrow – there are a few places where the stitches don’t catch the lining at all and I have to put in a quick parallel line of stitches. Aside from that, no issues. Lined bodice with no raw edges hanging out along the neckline or armholes!
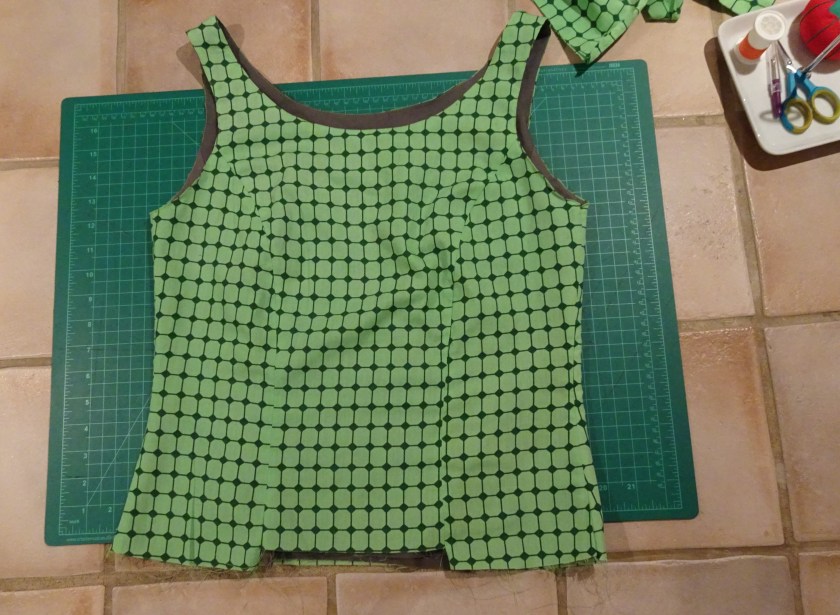
Next up is the zipper. This is an invisible zipper ($1.75) from the World Sewing Centre on Queen West. I really want to put this in tidily and with no seams visible.
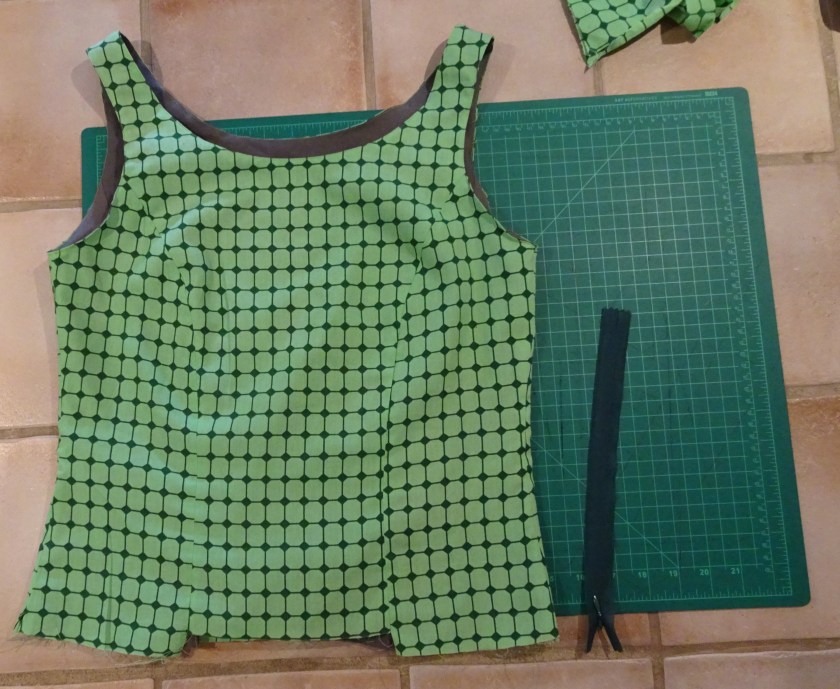
While asking Google how to do this, I discover the main problem is that I don’t actually have an invisible-zipper foot for my machine. Okay, onto the shopping list that goes. For now, I end up deciding to do it by hand.
First I unpick the bottom of the seam where I machine-basted earlier.
Then I baste the zipper tape to the flaps of the lining.

Attaching it tidily to the outer layer of fabric proves to be a challenge. I try several things, and end up improvising with this approach (in front of Netflix, under the tiny clip lamp): opening the zipper teeth, then temporarily whipstitching it, catching the edge; then going in underneath to open the fold and sew it down like that at the edge, and finally removing the whipstitch.
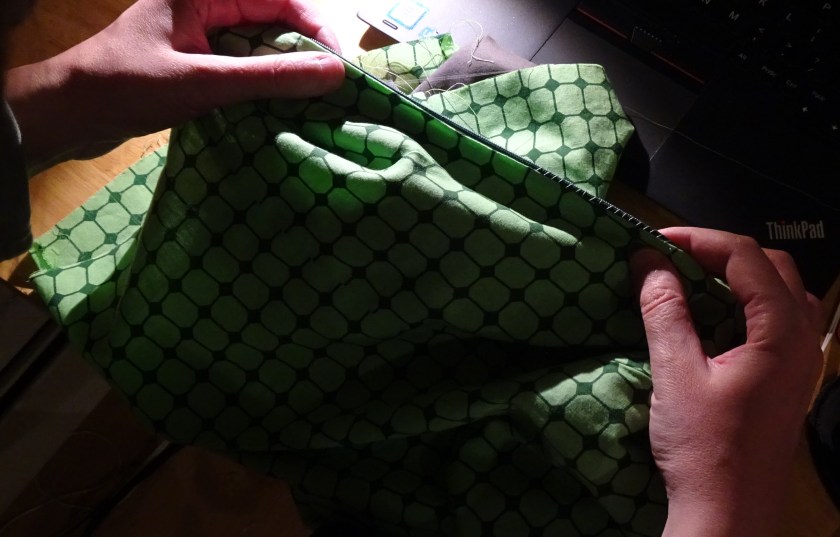
This takes a while, but is very tidy and sits flat against the side seam.

The downside is that when the zipper is closed, it is not as invisible as it could be.

Okay, well, better than the last time I put in a zipper. And the colour match is fine, plus this is a side seam, so not a huge problem. Plan: get an invisible-zipper foot and learn to use it.
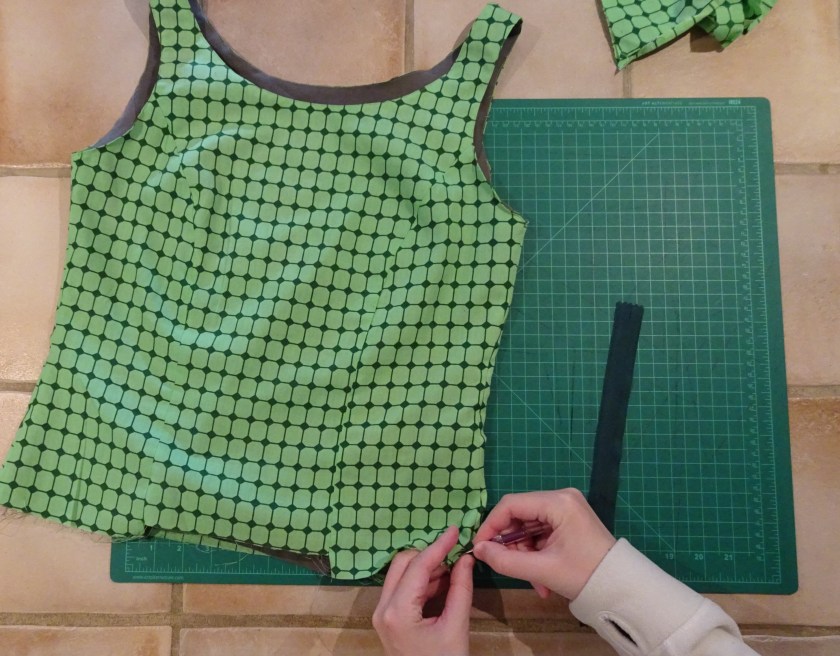
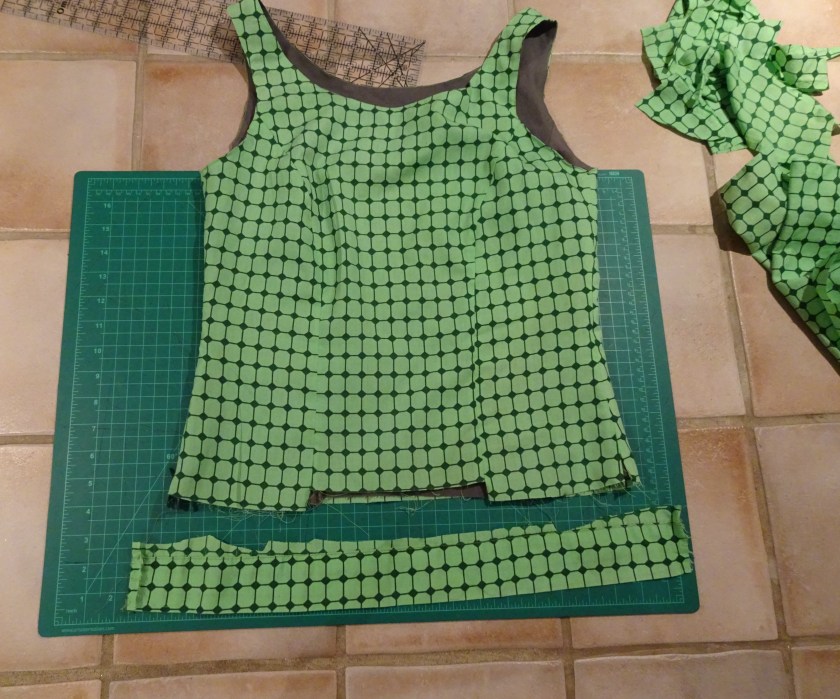
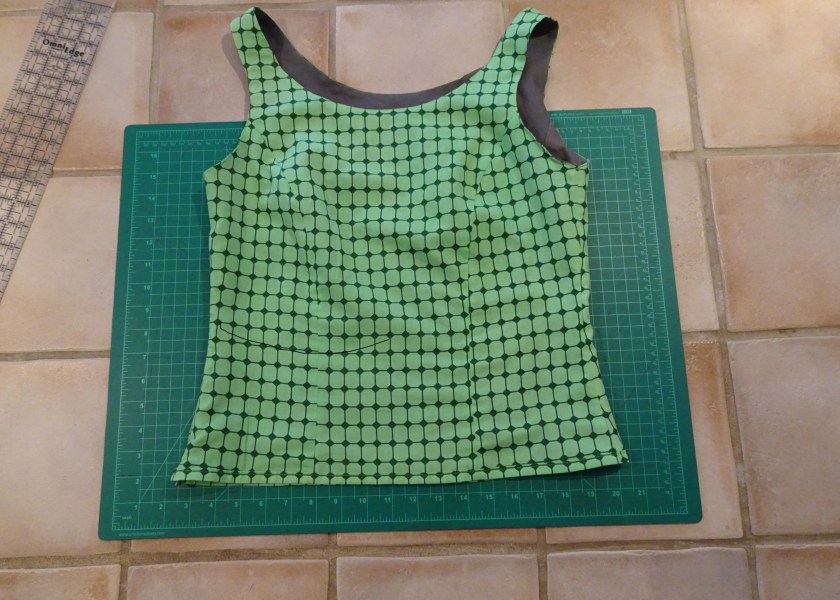
Now the only thing remaining to deal with is the bottom hem. Double-fold bias tape, I think. It’s not going to line up with the grid, but thanks to the princess seams this is already true, so okay!
There isn’t actually enough fabric left to do this on the bias for real, so we’re going to pretend. Fortunately, not much stretch required once I clean up the bottom edge.
One of the two lengths of pretend bias tape I prepare is the edge of the original pillowcase; the other comes from a leftover piece of similar dimensions. In both cases, I fold and measure and cut, then press the seam. Then I open that up and fold the edges towards the centre and baste that into place, then press that, and remove the basting.

I trim the bottom to be more even and then make an attempt at attaching the bias tape, which does not go well. At every point, either the lining or the outer layer ends up hanging unevenly.
My choices are: a) acquire a dress-form (definitely a goal, but right now not quite doable), or b) put the thing on and put in a gazillion pins or basting stitches to hold it together at the bottom before trying to attach the bias tape. Okay, let’s do that.
I try it on and close the zipper and baste the pieces together near the bottom while wearing it. Then I add the bias tape again. I manage to baste halfway around before realising I didn’t line up the side seam, so I rip it out and start again. This time I accidentally mistake one of the princess seams for a side seam, line it up, and cut way too much off the loose end. There isn’t enough remaining to go all the way around and line the seams up at the left hip. And I don’t have enough fabric left at all to make another binding strip in the same dimensions. Also, I trimmed the bottom enough – especially at the actual zipper – that I can’t just fold it up to hem it. Now what?
I think about it and decide to take the remaining half of the binding strip (the part that was going to go around the bottom of the back half), cut it off, and divide it in two horizontally. This will yield two new binding strips, each half the height, each with one crease already to get me started on converting them to binding tape half the height. Getting a bit recursive here. If anything, though, the smaller ones will be less noticeable, especially with a printed pattern, so okay.
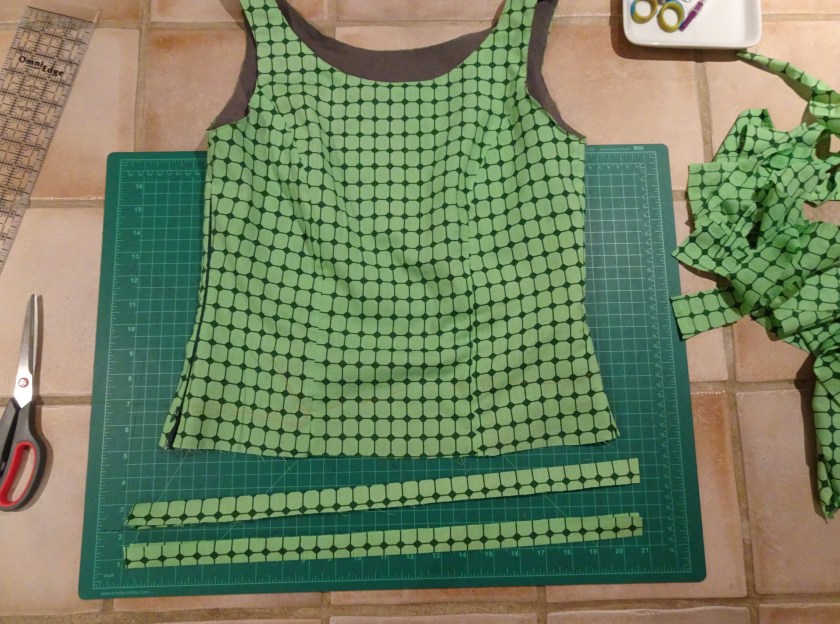
I baste those on and consider the results. Happy for the most part. All of the edges and seams are hidden.
Neither side seam is entirely satisfactory. The closed one was insufficiently backstitched, and while this is subtle, you can tell it was just beginning to pull apart when I attached bias tape over it. On the other side, the bottom of the zipper is kind of terrible. I accidentally cut off the bottom excess of the zipper tape, for one thing, and the bottom pieces don’t quite line up with each other across the zipper, and the pretend bias tape is uneven and super awkward at both ends because I almost ran out of length and ended up folding it clumsily in both places, which worked half-decently only one out of two times. I should have at least wrapped a piece of extra fabric around each side under the bias tape to hide the ends of the zipper.

I think about it and decide it’s acceptable. I run it under the machine to attach the pretend bias tape permanently, then remove the basting.
Only after I have completed this do I stare at it and wonder how the zipper ended up on the opposite side-seam relative to the model. I was aiming to have the zipper on my left, and thought I’d been extra careful to keep in mind that these things flip when everything gets turned inside out. Nope. I worked through it consistently and ended up putting a zipper in on my right side, which is where exactly none of my commercially produced tops or skirts or dresses have a zipper.
Okay, so the main takeaway message here is that I like zippers but have not mastered them yet. Someday! Goals:
- acquire and use invisible zipper foot;
- do tidier work at the intersection of the zipper and the closed edge of the fabric;
- keep better track of which side the zipper will be on at the end.
On the other hand, I spent about five dollars on the materials (allowing for thread and taxes) and nothing about it makes it too wonky to wear to the office.
Time to pose with the modem along the one empty wall!

