
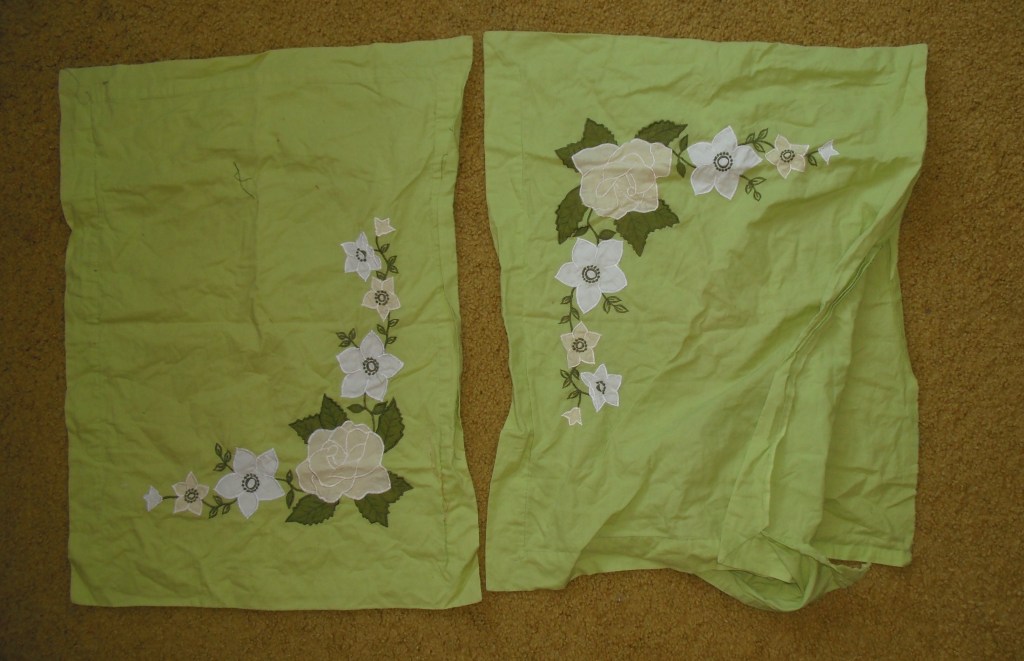
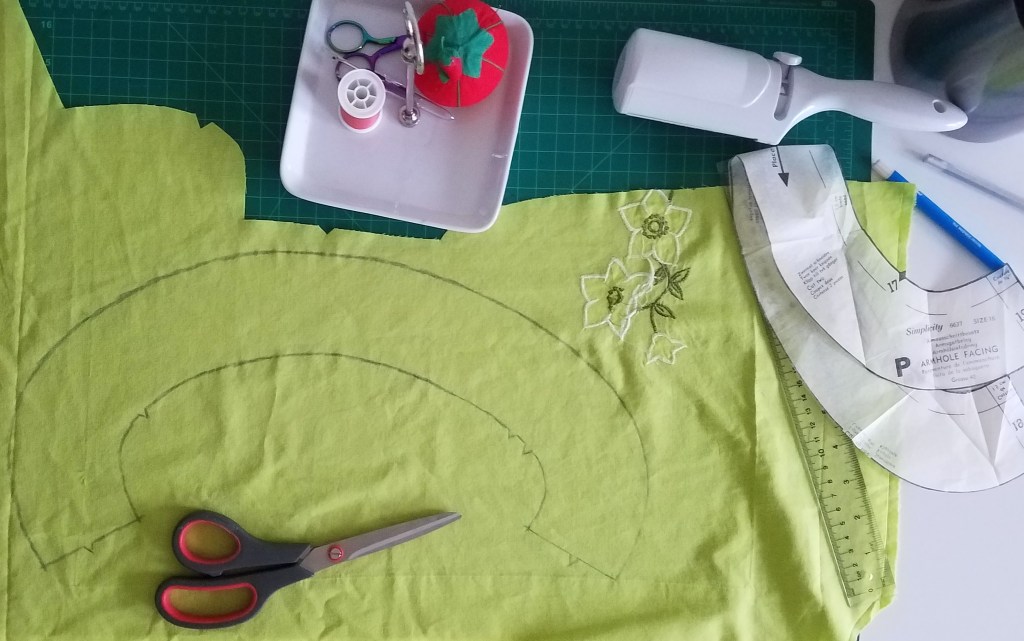
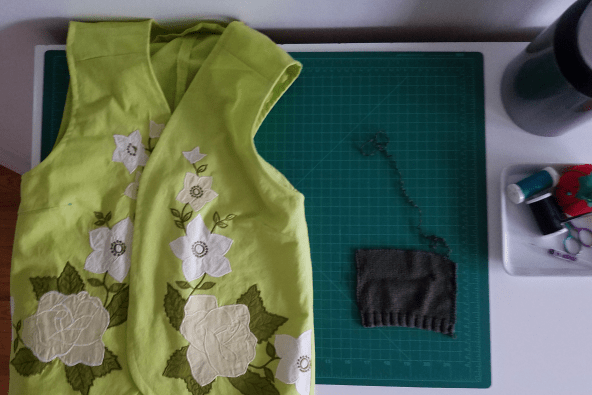
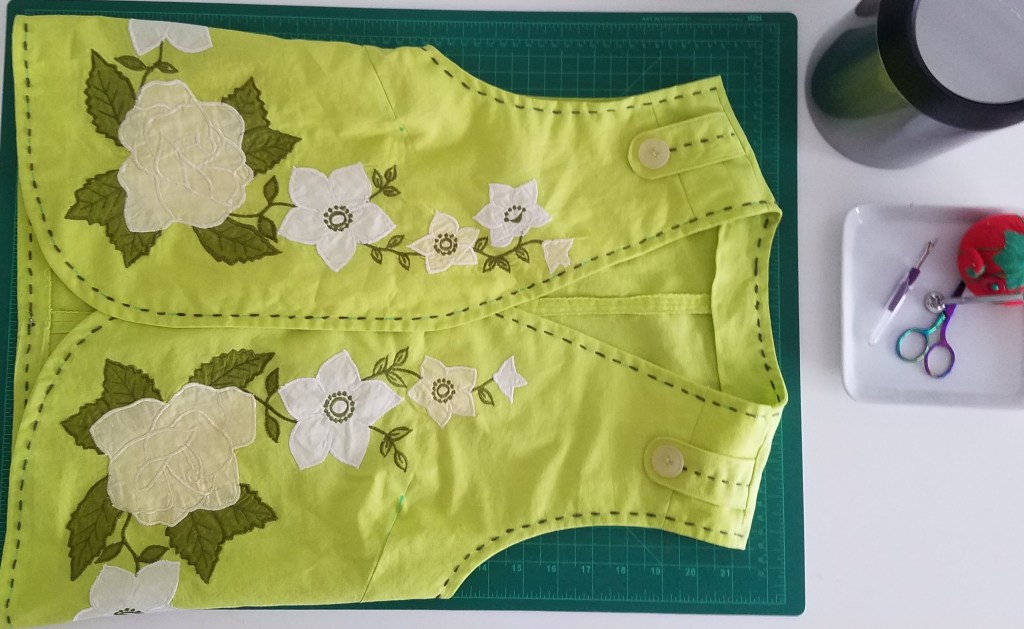
Here are a couple of pillowcases that I found at the Bloor/Lansdowne Value Village for a few dollars in March 2017 (the legendary trip I made for a half-off-everything Monday when I kept finding things I would happily have purchased anyway, which culminated in me walking away with an entire garbage-bag of textiles, plus about eight books). One of the pillowcases is slightly ripped, which bothers me not at all. They’re made from a very sturdy woven cotton with large fibres – almost, but not quite, at the tablecloth level. I find the appliqués inspiring. As I remove all the seams from both pillowcases and iron the fabric, I find myself wanting to take advantage of the fact that the appliqués not only match each other, but are each nearly symmetrical around the diagonal. They make me want to show them off in an obvious way.
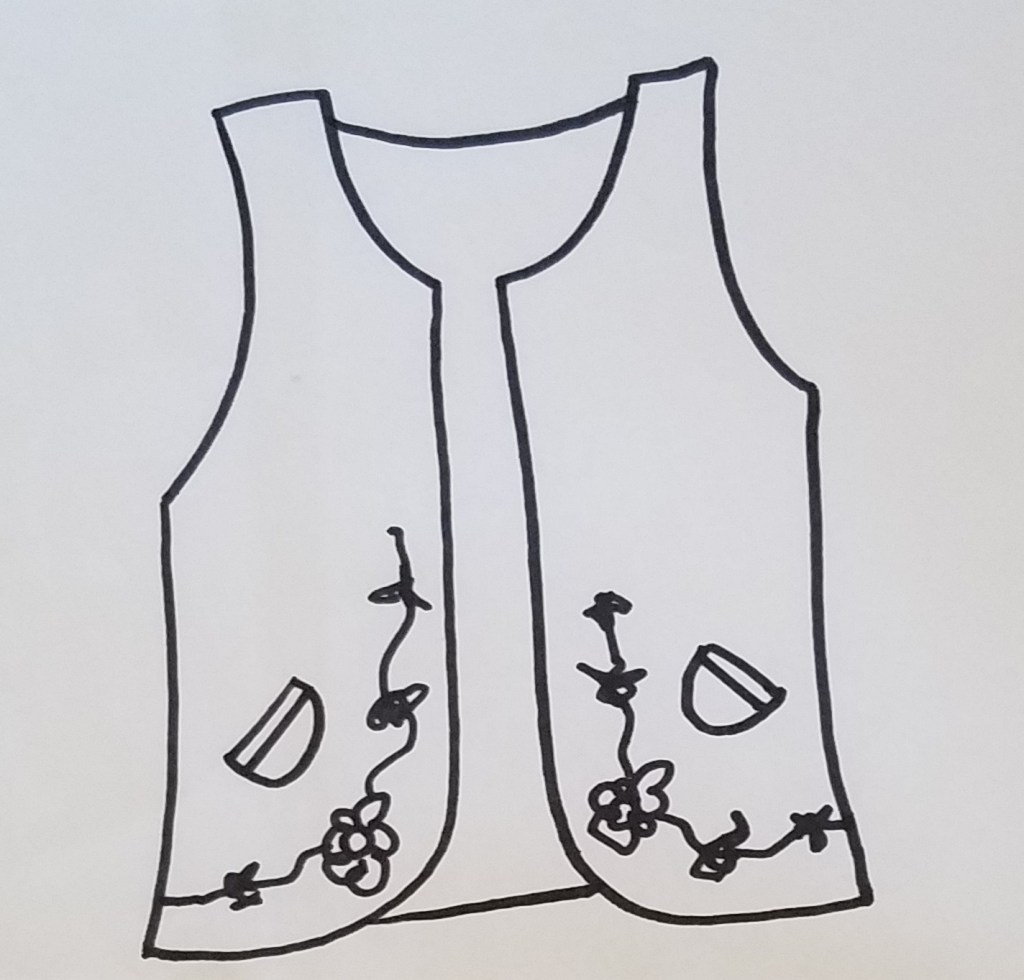
I doodle with a permanent marker on some spare paper, and eventually decide that a vest is called for, to be worn open over a dress or something. Rounded corners at the bottom front, with the appliqués running up both sides of the front (almost, but not quite, symmetrically) – and without darts anywhere near the bottom. Diagonal pockets too?
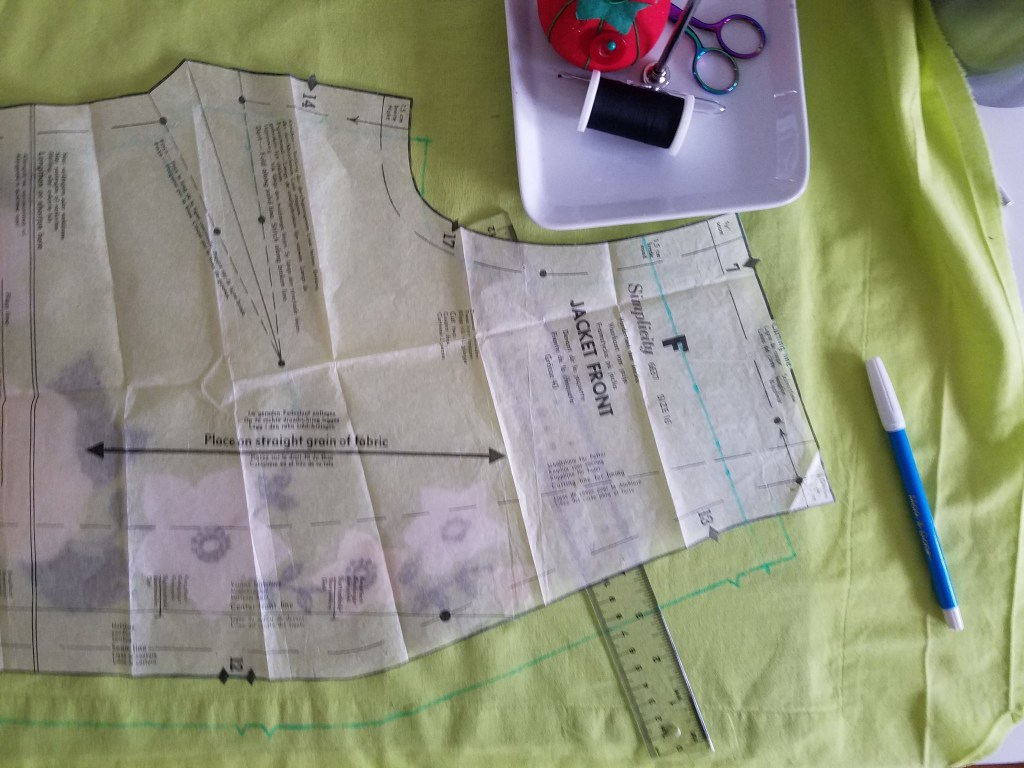
That’s about as far as I get for a while. I’ve never made or drafted anything even kind of similar to this, and am not sure how to get started. Until I go through a box of backup craft supplies and find a vintage pattern (from the UK or Ireland in the ’60s) that has exactly what I was looking for. A vest pattern with rounded edges at the bottom and no darts too close to the bottom. It even includes pretend pocket flaps – though I end up deciding to ignore those.

I thought at first that the pattern was completely unused, but I was fooled by a previous owner skillfully managing to fit all the pieces back into the envelope tidily. And having cut out most of the ones I need, too. A bit of kindness in return for upcycling?
After ironing the pillowcase pieces, I lay them out on the bed. That reveals a problem: if I want the appliqués to be nestled close to the curved bottom edges in a symmetrical way – and I do – then one of the pieces will necessarily be too short (since the only way of accomplishing this is to turn one of the pillowcases 90 degrees to the side, which means going up the shorter side of the rectangle).

I decide that I’m making both of the front pieces compound ones. The top of each front piece is getting a little seam parallel to the shoulder seams. I draw a dividing line 2″ from the top of the front pattern piece, but that turns out to be not quite enough, so I draw another at 3″ down and use that instead (plus seam allowance) to cut the main front pieces out around the appliqués.
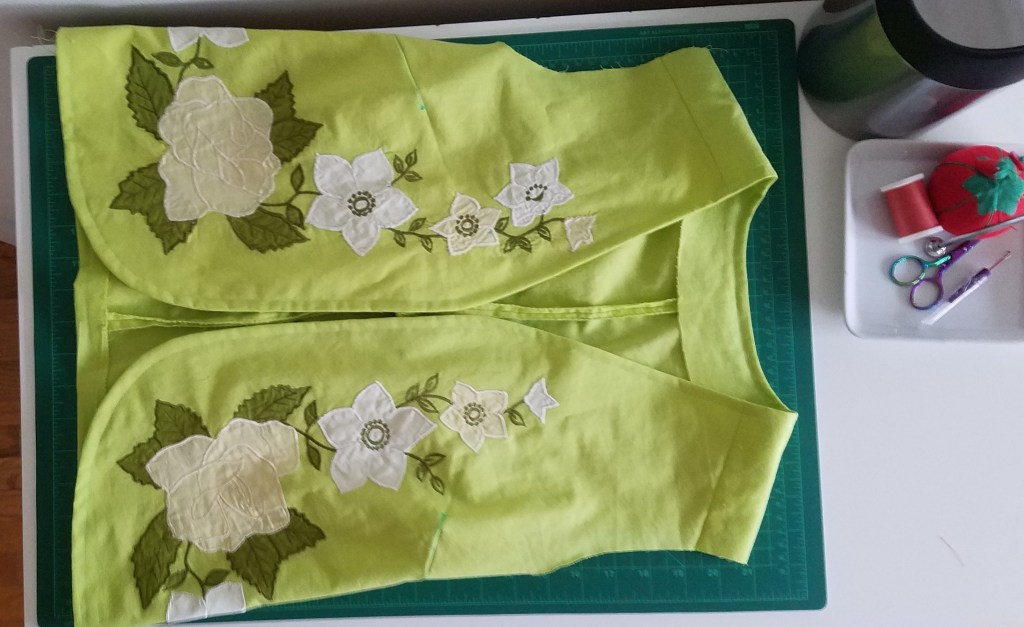
Then I cut two smaller pieces, corresponding to the top of each front panel plus extra seam allowance. Yep, this’ll work fine.
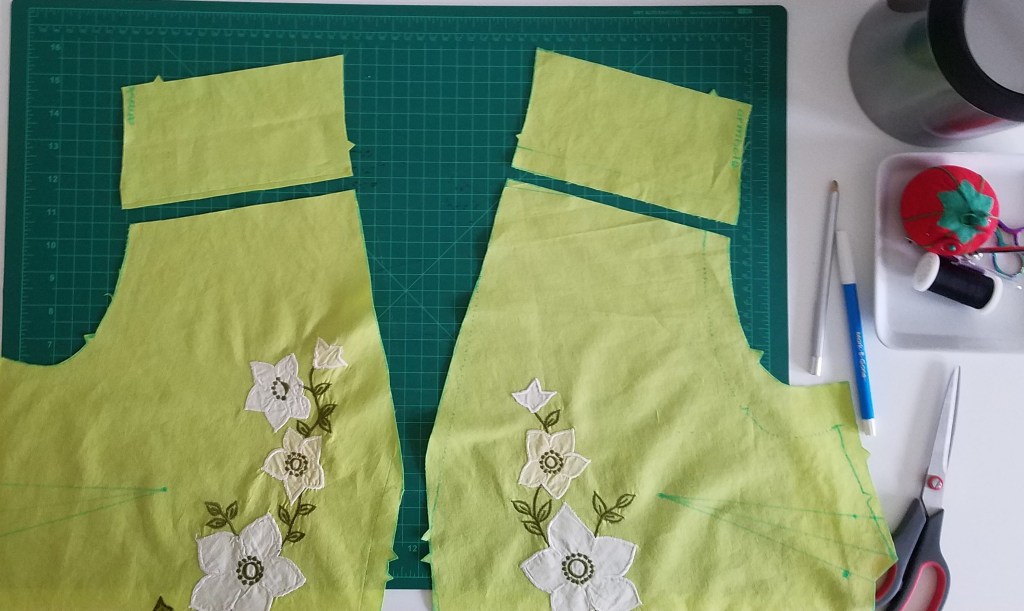
Speaking of compound pieces, the back of the vest is supposed to be one piece, but neither of the two larger pieces of empty fabric is large enough on its own. Centre-back seam time.
I finish tracing and cutting out the smaller pieces, then begin assembling the vest.
The pieces are really self-explanatory, the instructions less so – which probably accounts for why I end up assembling everything in the wrong order (note to self: the facing pieces should have been attached to each other first…) and have to improvise a little bit.

Fortunately, no harm done – I get the shoulders together and looking fine. I also finally manage to get the darts sewn down without being too pointy at the ends (one of several reasons why it is taking me some time to make peace with darts in general).
Before sewing the side seams, I try the vest on. The neck section is very good, and I’m thrilled with the placement of the appliqués, and the height is bang-on. The width is not so good; it’s much too big around. The issue is partially that the pattern size is a little bigger than my dimensions in the first place, partially that it’s cut generously (it doubles as a jacket that goes over other layers), and partially that the default pattern calls for an overlap with buttons in the front (while I’m after something that hangs open, no overlap required). A lot better than something coming out too small, though.
Time to make some adjustments. I draw a couple of lines on the vest experimentally and then hand-baste, taking it in about 6″ at the armhole on each side and 4″ at the bottom (since I want the bottom a bit flared). This gets rid of a big piece of appliqué at the bottom of each side seam, but I don’t care so much about that, because the sizing is much more influential in terms of whether I’m going to want to wear the results. The bust darts are now smaller and not really doing much, but I’m not interested in extending them into the appliqués, and undoing them to make the pieces flat wouldn’t be better, so I just leave them as they are.
Fortunately, I’m now getting the sorts of side-seams I wanted, so I cut off most of the excess and sew it down. With my French curve, I cut some new armholes and try them out and adjust them a little bit, which goes decently. Now I’m getting excited because the vest is starting to look like what I was aiming for. Time to finish the edges around the bottom and the neck. With the wrong sides facing outwards, I trim the outer seam allowance around the edges way down, clip the corners, turn it back to the right side, and topstitch at 3/8″ all the way around, which is super fun and very satisfying.
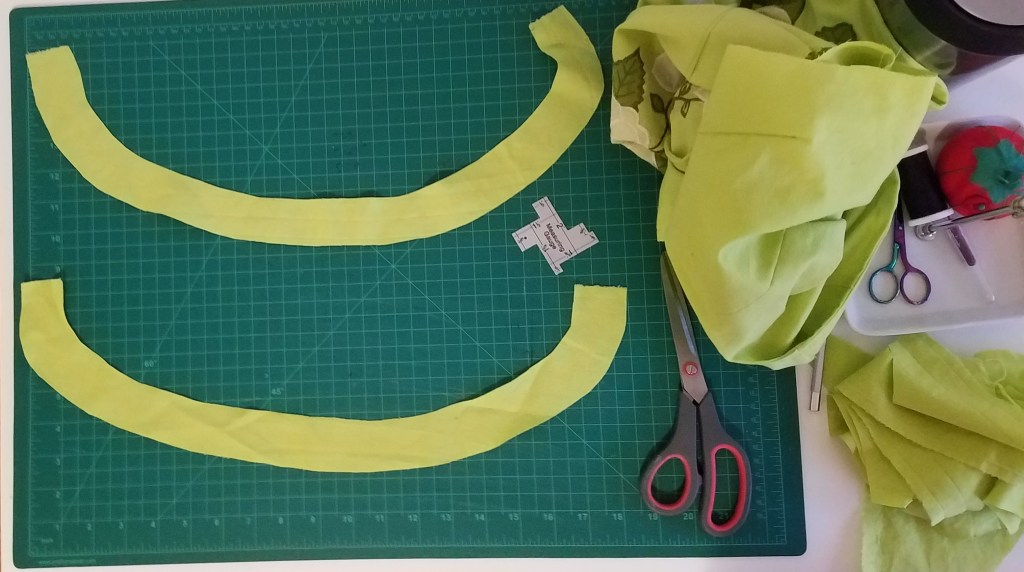
Now to finish the armholes. The original facing pieces for these don’t match anymore; I’ll have to trace and cut new ones. Fortunately, I think I’ve watched coolirpa do this (or maybe I’m just thinking of her custom-Peter-Pan-collar instructions, which are similar). It goes straightforwardly.
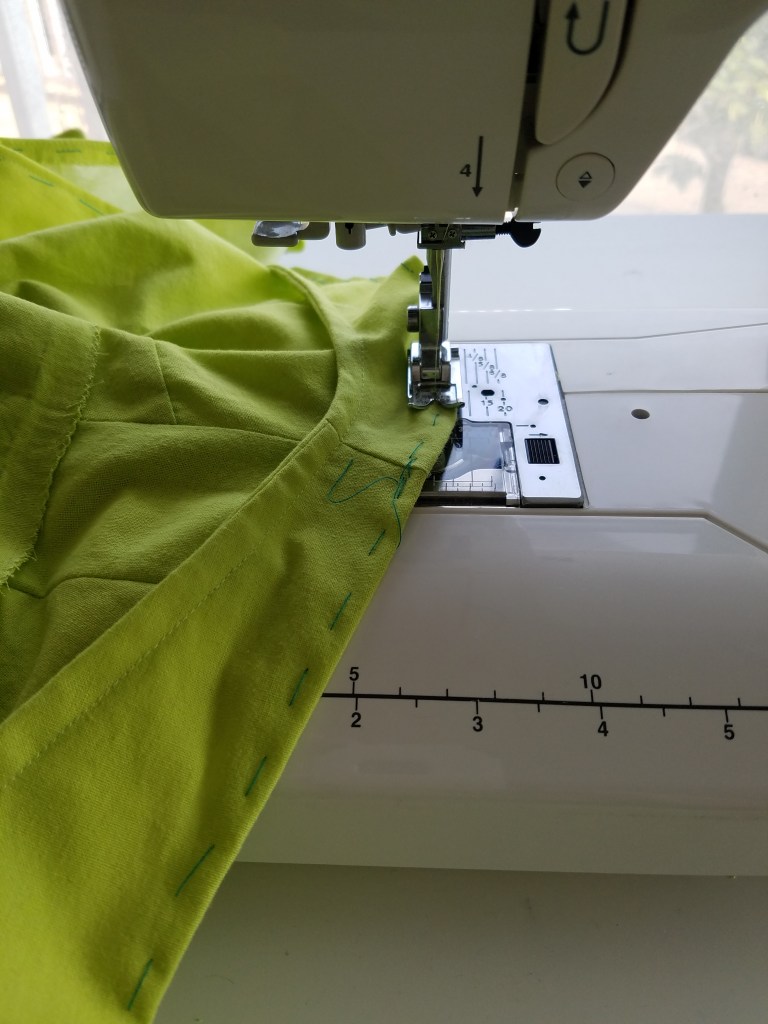
I baste those right-sides-together (and do some additional basting to tidy up the inside facing pieces).

Then I sew the armholes on the machine, clip the seams, turn the facings inside the vest, baste down wrong-sides-together, and sew them down like that. While I’m at it, I clean up and secure the seams on the inside.
I try it on and am basically satisfied. There is some minor wonkiness in the facing pieces but it is insubstantial. The not-entirely-helpful bust darts being slightly off is the only sign from the outside that this is homemade, and I’m not irritated enough by that to not wear the results.
One issue remains, which is that the entirety is insufficiently funky. I am slightly, but noticeably, underwhelmed. I’d like to add a large decorative running-stitch in forest-green around the edges, and do something with the extra seams along the collarbone (I don’t mind them, but I do want them to look more deliberate than this).
And hey, I have some recycled forest-green yarn left over from a knitting project. It’s not a perfect match for the vest – it’s a bit darker than the forest green in the appliqués – but it’s close enough. More importantly, as it turns out, I enjoy upcycling. In this case, I even find one of the pockets from the original knitted garment (from I think the Danforth Value Village in November 2020), which has long since been deconstructed otherwise.
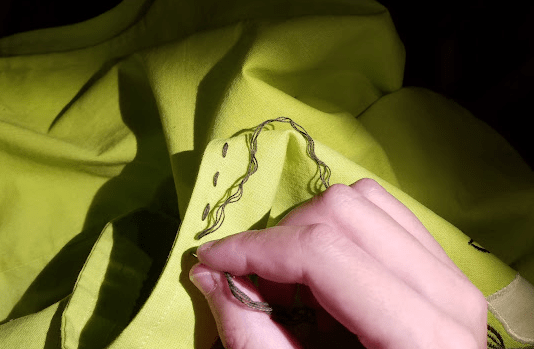
Because I know what my running stitches look like if I’m not careful, I go around the entire edge (bottom hem, lapels, and neck) with a marking pen, drawing half-inch line segments alternating with half-inch gaps. Now it’s basically the sewing equivalent of paint-by-number. Except that it turns out I want quarter-inch stitches, not half-inch. Good enough to use as a guide, though. I find the sharpest tapestry needle I can find (which is only moderately sharp, but will work well enough), and sew all around the edges. Am pleased, so I decide to do the same for the armholes. By this point I’ve figured out how to use the line of machine stitching to space out the running stitch, so no need for additional pen marks.
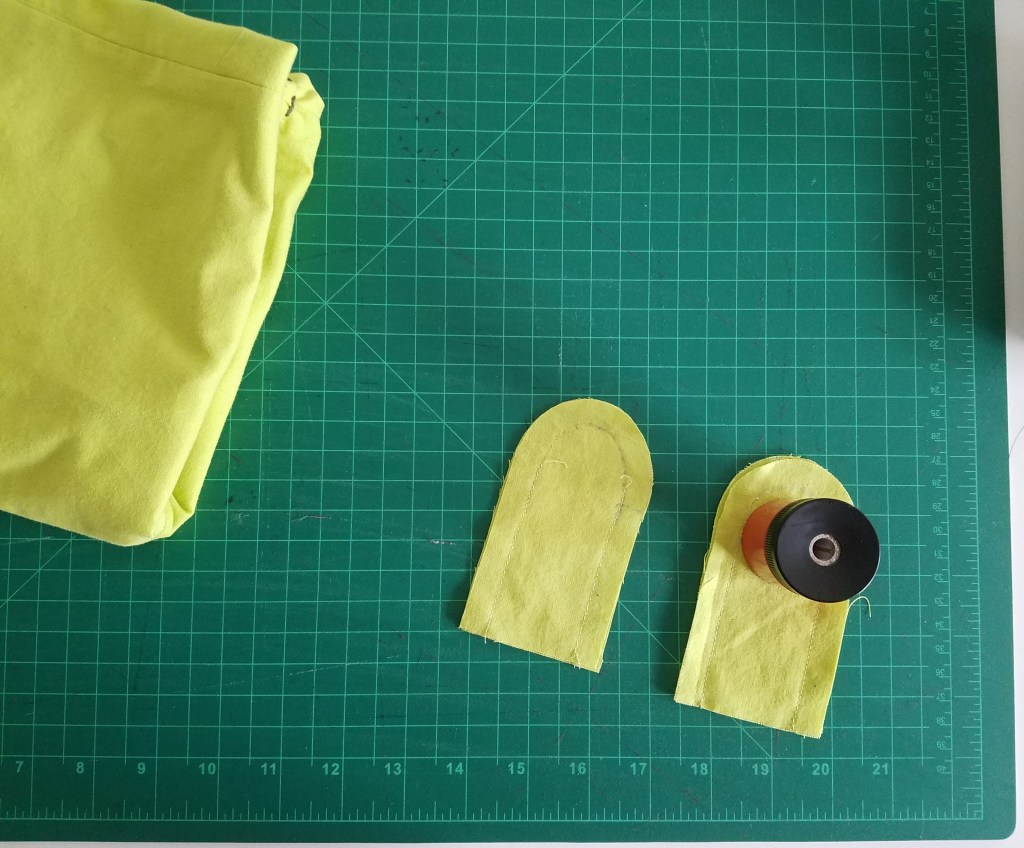
Now to do something about the extra seams to make them more interesting. I consider a few options and end up setting on decorative button-tabs from each shoulder seam; I have a couple of large buttons lying around that are somewhere between off-white and transparent, which is a good match. Putting in tabs means undoing the middle portion of each shoulder seam, but that’s not a huge deal, and I think it’s going to be worth it.
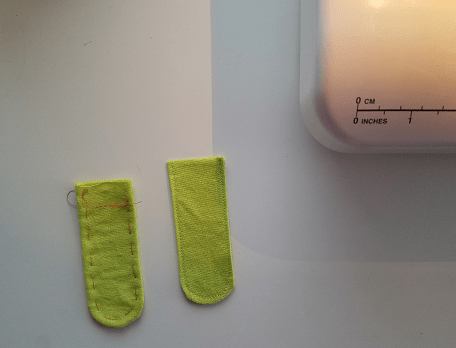
I cut a pattern piece from extra craft paper and use it to make four tabs with rounded bottoms.

Drawing the seam shape is a bit tricky until it turns out that my pencil sharpener is exactly the right diameter. Bit of luck!
I still have trouble getting the curvature even enough on the machine, so I do it by hand.
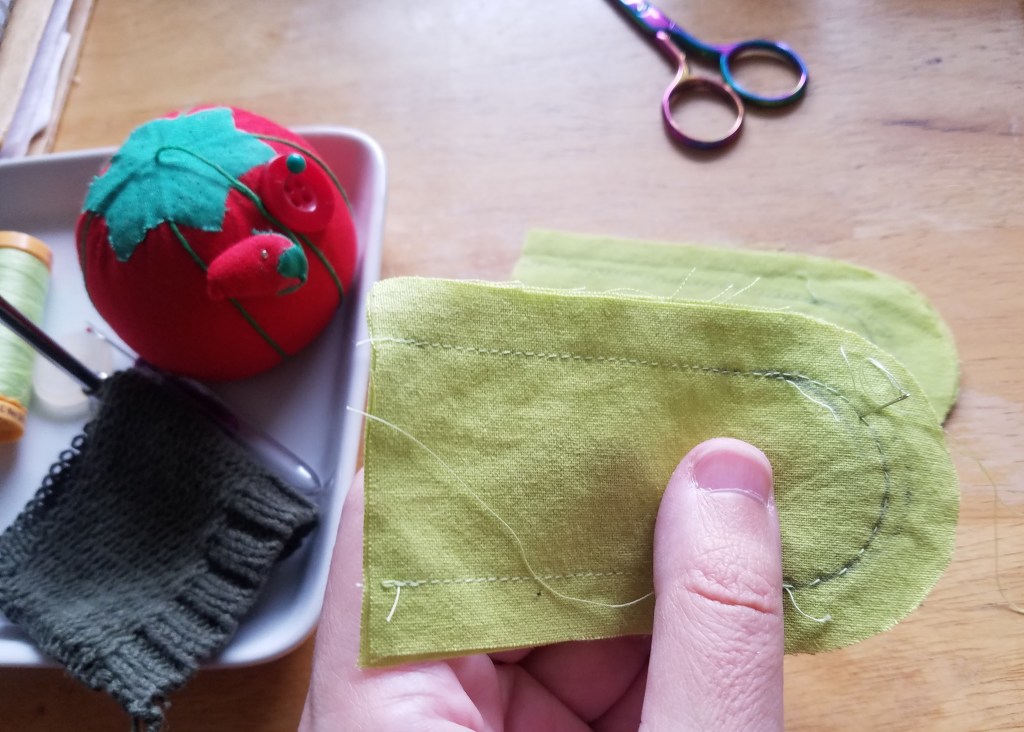
Turning inside out, basting, machine-ing…
Now it’s time to perform minor surgery on the shoulder seams. On each side, I open a gap…

…insert a tab…

…flip it over, baste, resew the shoulder seam with the tab fixed in it, clean up the stray bits of thread, and add a line of running stitches and a button!
Now to get rid of all those pen and pencil marks. Into the wash it goes! And then under the iron.
Edited to add: Just going to post this for now. I have perfectionistic instincts, and almost always, the hardest part of the blog posts that result in items of clothing for me is the photo at the end. Basically, I tend to like photos of me when other people take them – selfies, not so much. So typically I take 20-30 with my camera and tripod, go through them, and pick the best one. The problem is that even the best one typically still strikes me as not very good. Will try again on another occasion.
