
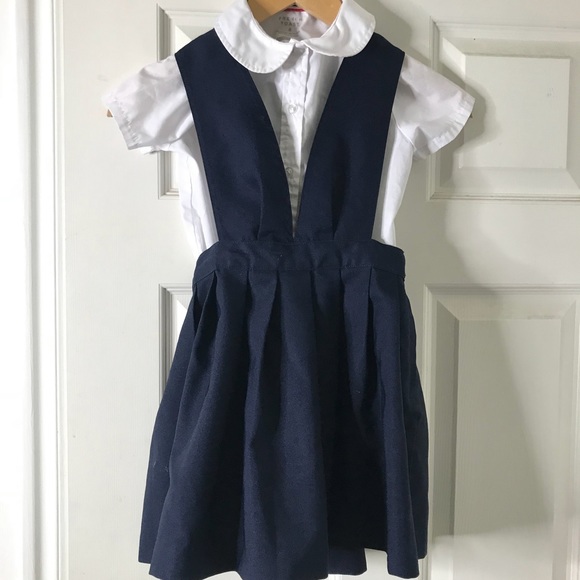
I went to a clothing swap in January 2018 with a $5 entry fee. There were a lot of good finds, most of them wearable or nearly (the little black dress only needed the seam above the kick-pleat fixed). However, there was one item that left me feeling as if I’d won the refashion lottery. This is a kind-of-worn-out vintage Adrianna Papell dress, 100% silk, which I’m guessing is from the early 1980s. Because, well, 1980s.

There are two reasons why I’m definitely not going to wear it like that. The first is that there’s some noticeable damage, especially around the gathers that shape the waist.
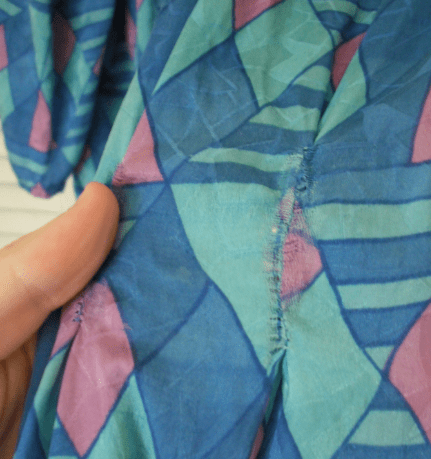
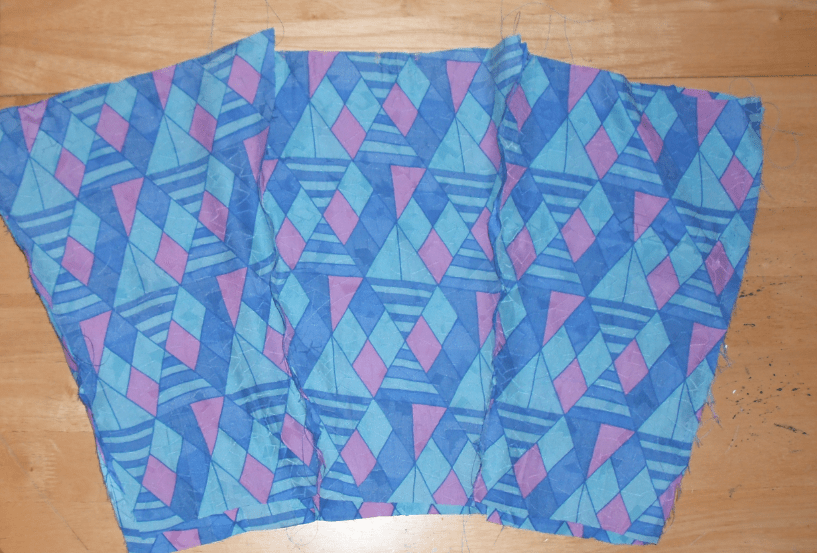
The second is the cut. This dress has a row of buttons up the front, puff-sleeves, and a belt. None of those things appeal to me in the slightest. Let’s just say that my taste in dresses is much more 1960s than anything else (and that belts and I are not generally on good terms). That said, most of the fabric is in good shape and I absolutely love the print here. I have a distinct fondness for bold geometric patterns, and the colours are fantastic. I want to show it off!
It demands careful handling, though. For one thing, it’s busy enough that it’s perched precariously on the edge of a slippery slope running down to ‘clown costume’ (or at least ‘harlequin’). Then there’s the very, very subtle nap. In that diamond lattice, there are a few right triangles hiding; in the main parts of whatever I make, ideally they’ll all need to point upwards. For now, I take note of this.
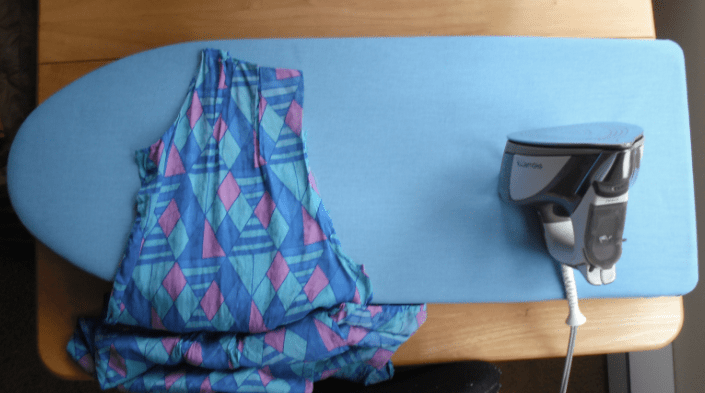
I don’t have an immediate sense of what I want to create, so I just go ahead with disassembly, then ironing.
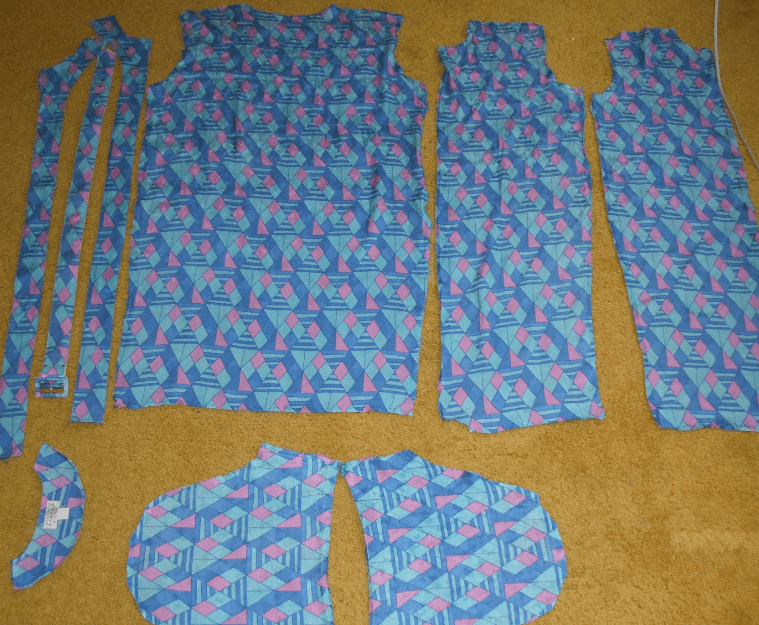
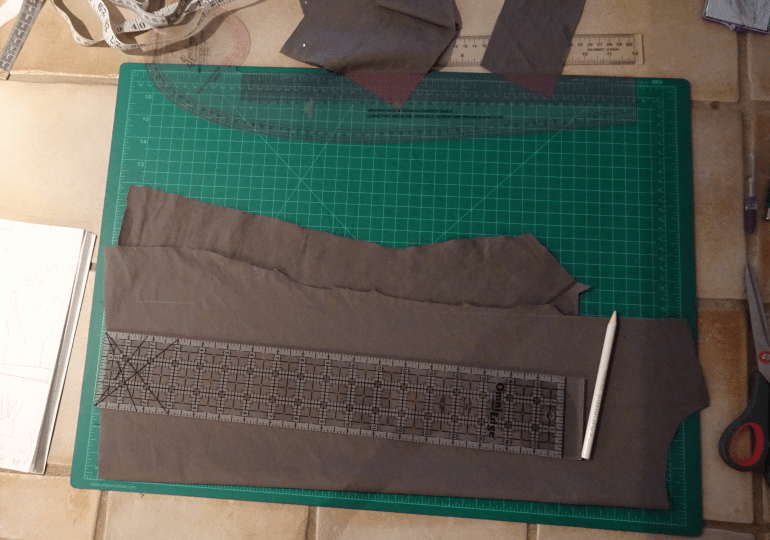
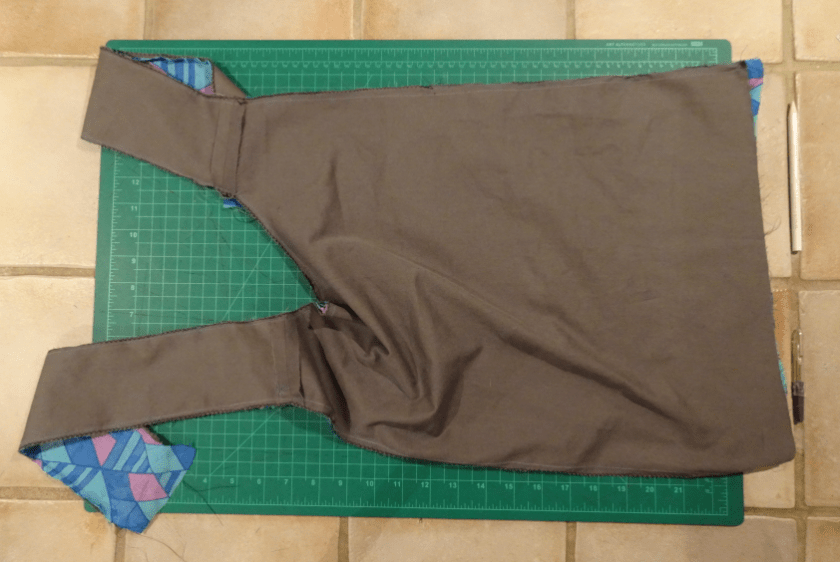
What’s in a dress? In this case: back piece, two front pieces, two sleeves, two front edge panels (buttons and buttonholes), belt, pile of buttons, and that crescent-shaped piece holding the label. It’s a fair bit: the dress was a (vintage) size 14 and had all those gathers/darts. Both of the edge panels and the label piece have fusible mesh interfacing attached to them.
At this point, I wait and mentally fidget with the fabric. Eventually I realise that what I want is a pinafore dress or something like it. Maybe with a panel skirt on the bottom? I don’t want the top to look too much like the front of a pair of overalls, but on the other hand this is not a print that’s going to play nicely with curved darts. They’d need to be small and/or hidden if there at all.
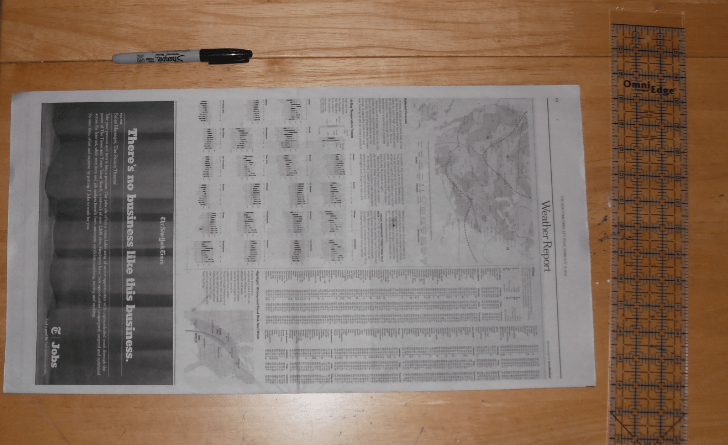
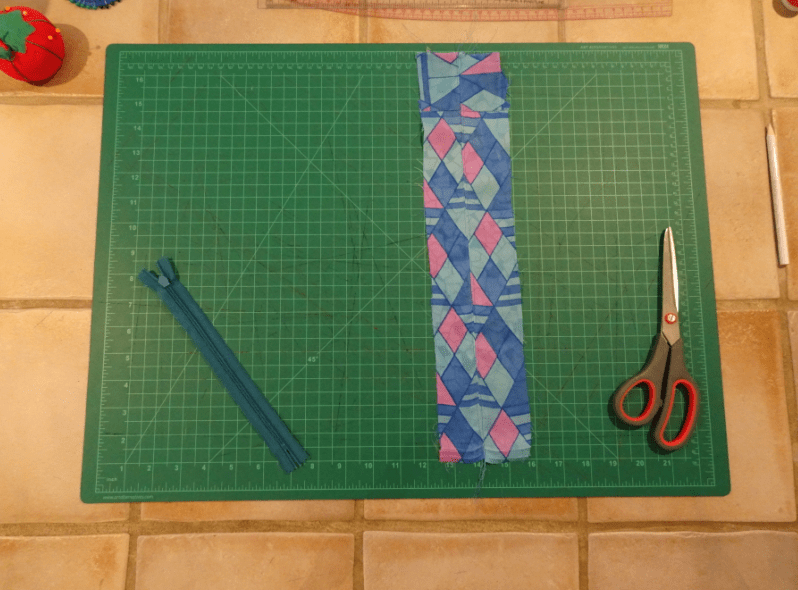
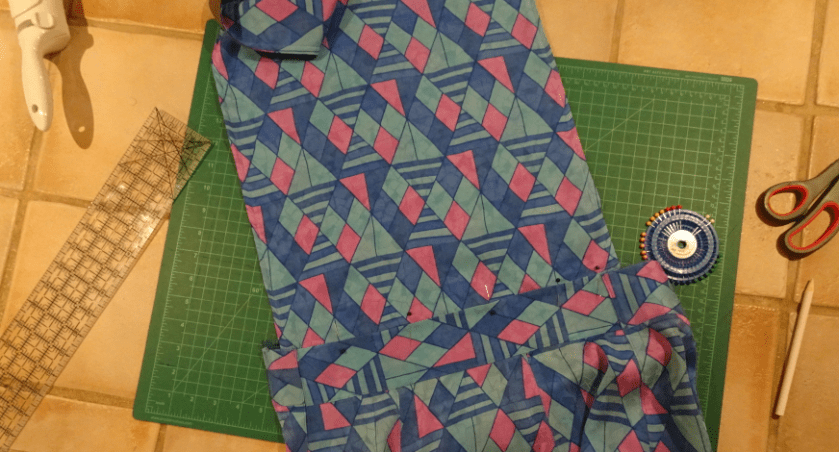
I decide to begin with the panel skirt, then see how much material I have left over and play it by ear when it comes to the upper section. So. Six-panel skirt time! Where’s a newspaper?
I do a bunch of calculations and cut a pattern piece from the edge.
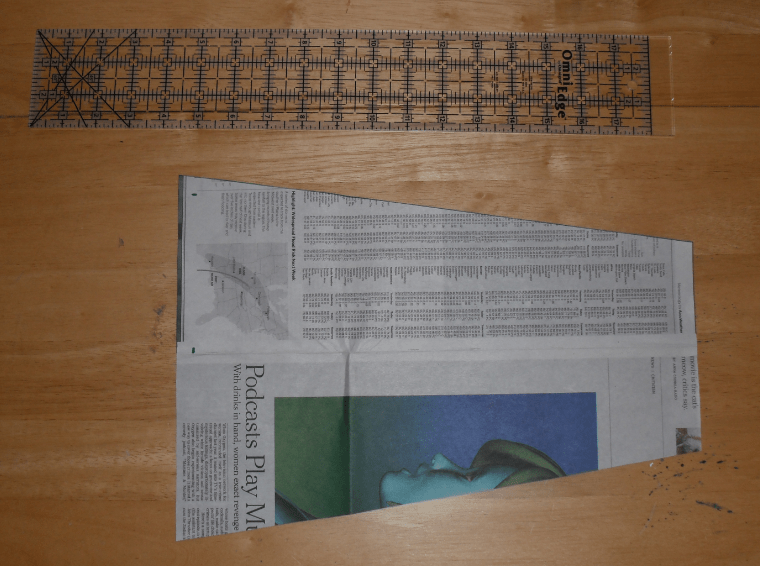
(I make a joke that the face above the podcast article looks like a reboot of ReBoot. The resemblance isn’t intentional as far as I can tell, but it turns out there is a ReBoot-reboot happening, so maybe the joke’s on me?)
In positioning the pattern-piece to cut the panels out, the priority is preserving the nap (including not rotating the pattern piece diagonally). But almost as important is maximizing the size of the leftover fabric pieces so that I end up with more options for the top of the dress. Aside from the sites of the former waist darts: those are so worn that I avoid them entirely.

Silk this fine is a pleasure to wear, but not to cut. It’s so slippery that I struggle to keep things tidy with the scissors. Finally I switch to holding down the ruler and using a rotary cutter…even though I’m between cutting-mats at the time of doing this part and that means I have to rely on a solid piece of cardboard instead. Not recommended. (Apparently when I said that I like using recycled materials, I meant it.)
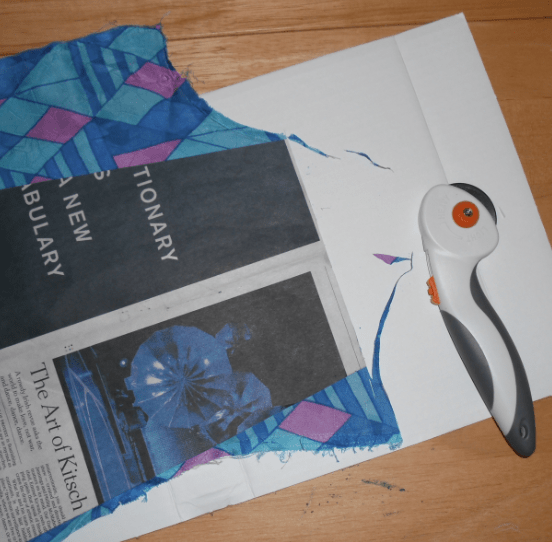
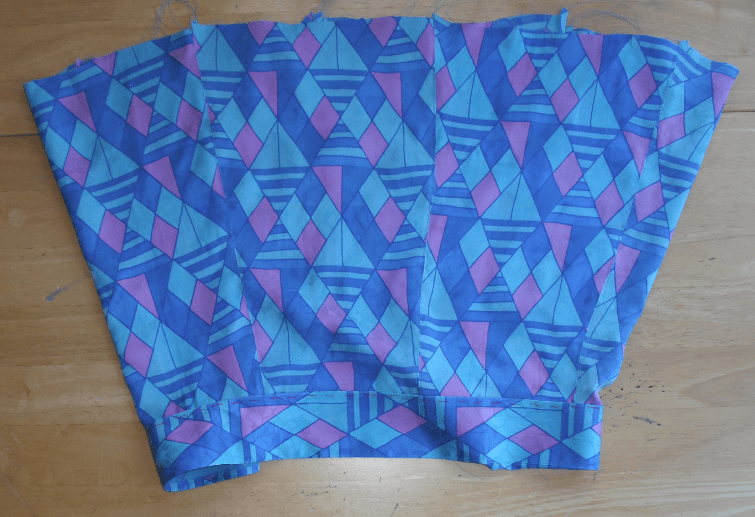
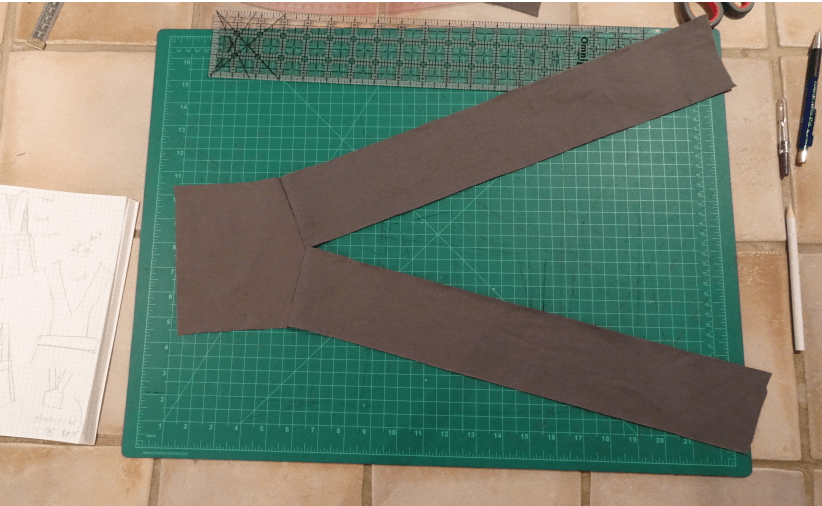
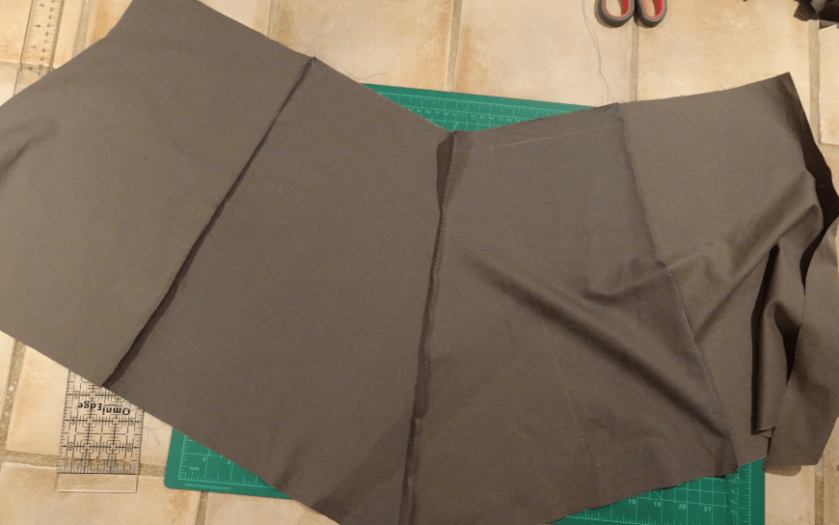
I cut two skirt panels each from the front left and front right pieces of the dress, and get the last two from the top of the back piece. The button-panel, interfacing and all, will get to be the waistband. This is a slight nap violation (since I’ve rotated the panel 90º), but not of the sort that would bother me (i.e. 180º). Pretty much inevitable, and no worse than the belt from the original dress.
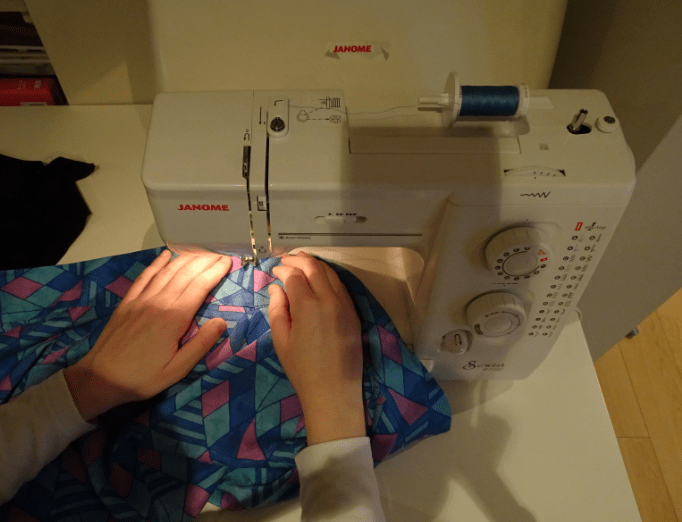
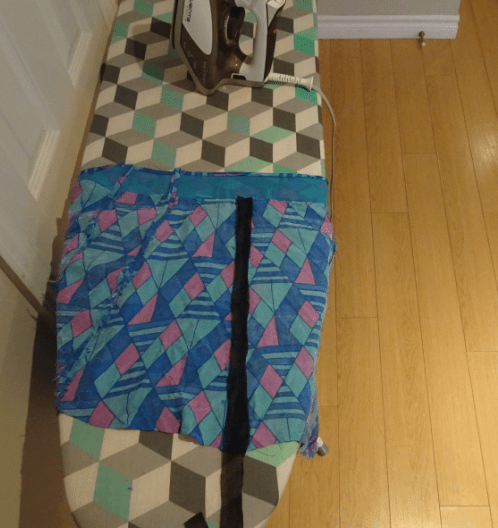
I re-iron all six pieces to flatten them, then begin sewing them together.

Then I try fitting the combination around my waist and hips. Looking good, so I sew halfway up the final seam and stop early in order to leave room for a zipper.
Now there are a lot of seams to press and clean up on the inside.
Zig-zagging to finish the seams, it soon turns out, doesn’t work well. I mean, silk frays incredibly easily, so I’m not leaving these seams totally unfinished; however, it’s so delicate that a lot of the zig-zagging I’m doing is just falling out and/or adding a lot of awkward bumpiness. I consider. For now, I topstitch around the seams with a margin of 1/16″.
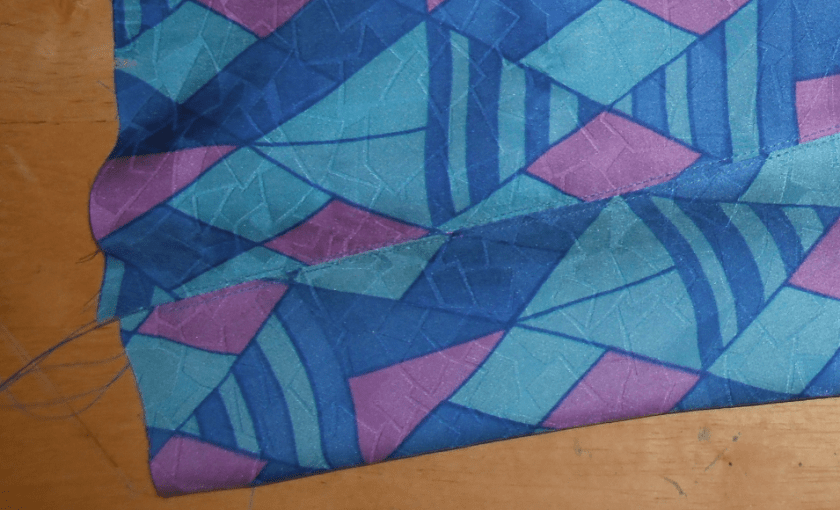
It’s painstaking and takes a long time, but it looks tidy and adds structural support, which isn’t a bad idea. I decide to consider the unfinished edges later.
Then I baste the waistband to the panels, trying to make sure I don’t overstretch it in the process.
I’m worried that the result is too small, but I try it on and it’s actually too big – by 3-4 inches, even allowing for the incorporation of a zipper. Aaaaarrgh. How did that happen?
I consider. I don’t want to make the skirt asymmetrical between the front and back by e.g. removing one of the six panels. I really don’t want to undo all the seams and resew the panels together in a more narrow fashion. So what I end up deciding to do is retain this panel layout otherwise but take in the sides. I remove the waistband, measure it side-to-side, divide by 2, and use my French curve to cut new side seams. This means the waistband needs to be curved rather than just a rectangle, so I take a breath, cut the waistband in half, and re-baste it to the skirt, leaving some extra just in case. No good. Now it’s too small – again by 3-4 inches. Frustrated, I react the logical way, which is shove the entire project into a box and sulk about it a bit.
About 18 months and two apartments later, I’ve decided I’m ready to revisit the thing. I take apart the old side seams. The new plan is to put a single vertical rectangular panel in at each side. This will give me two side-seams per side, offset from the centre. The piece on the left hip I’ll divide in half so that the zipper can go in there. I’m not totally thrilled about the number of vertical seams. Also don’t love the idea of a compound waistband, but at least this means I can introduce some three-dimensionality (i.e. it’s not going to be a basic rectangle), and that’ll ensure a better fit.
Okay, here we go. I decide to use the original sleeve pieces for the new side panels, since they’re intact and a good 14″ long each. I cut a generous slice from the middle of each sleeve.

Twice I take a piece of the original waistband, cut it into a slight trapezoid, and baste it to a sleeve section. So far so good. I sew that down. Then the entire left-hip panel gets divided vertically to allow for the zipper. I measure that for now and mark where the bottom is.
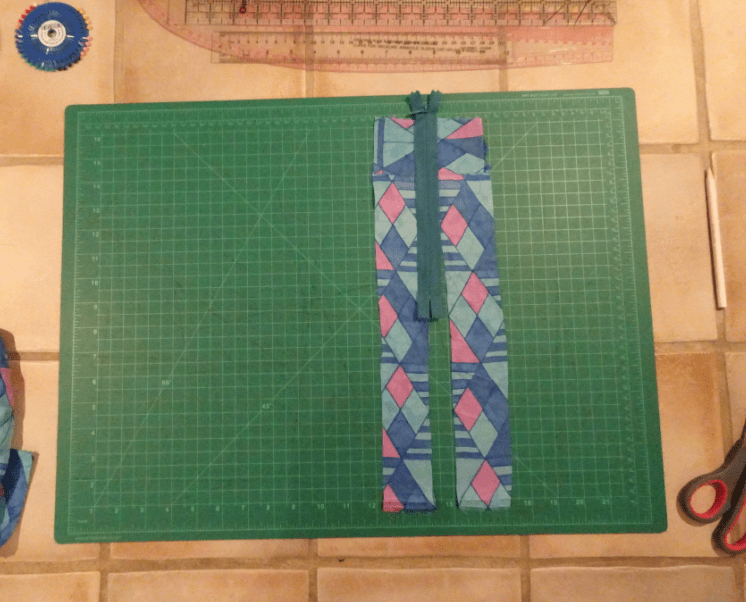
I sew that together, switching to a big machine-baste stitch at the bottom of the zipper.
…then baste the zipper to the flaps and unpick the machine basting.

After that it’s time to attach the new side panels and topstitch to match the rest of the waistband.
I need to sew in the zipper, too. With fabric this delicate, I don’t want to risk sewing a zipper only to the inside of a narrow seam, so I settle for topstitching it in. This is far from the most elegant option, but the print is lively enough that I decide it isn’t worth worrying about.
The raw edges inside are still a frayed untidy mess and a couple of them are actively threatening to come apart. I make a note to use French seams or something next time I have silk to handle. For now, I add strips of fusible interfacing over all of the places where the panels meet. This makes the inside look decidedly non-professional, but then I’m just someone who messes around with upcycled materials.
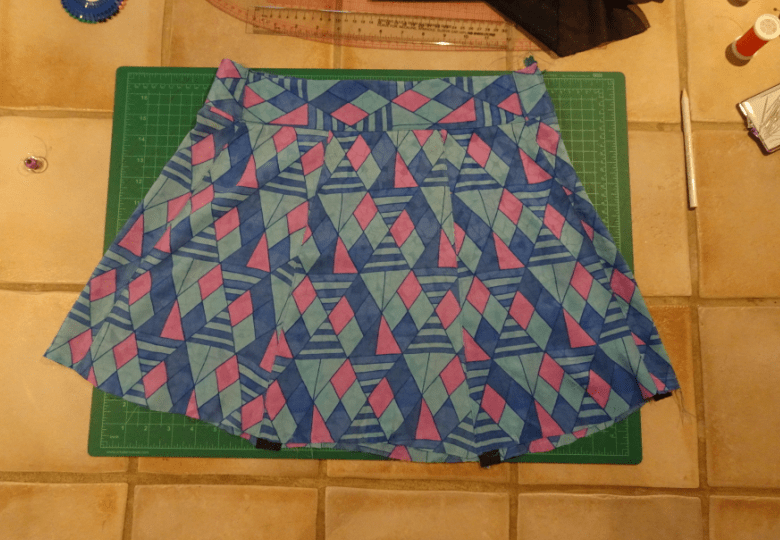
The interfacing does its job and does not affect the drape. I try the thing on and it finally fits me. It actually looks good! It’s a little short, but I pretty much always wear leggings anyhow because I am bad at not getting cold.
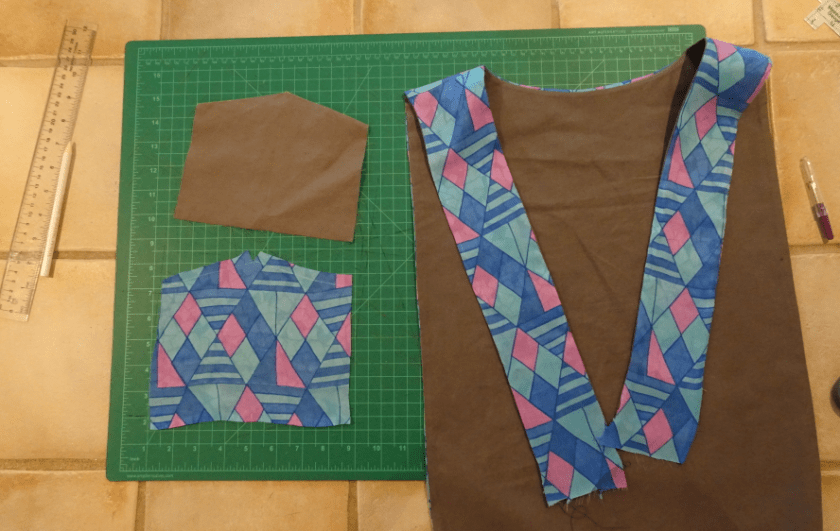
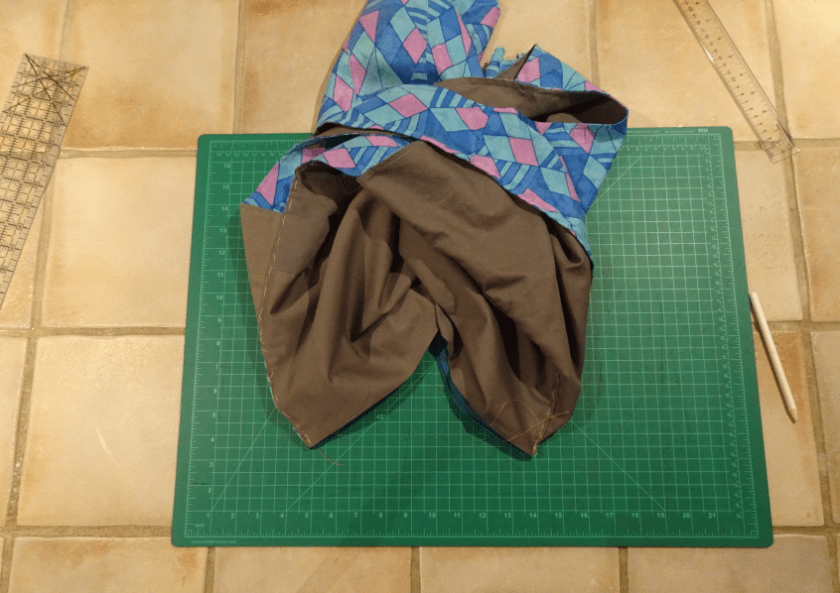
It’s now time to get to the other components. Just what is the top of this pinafore-dress thing going to be, anyway? I decide to use process of elimination. I have one very large piece left, a few medium ones (about 8″ by 8″) and many, many scraps.
I doodle a bunch of options in my notebook. I don’t want to deal with bust darts, certainly, and it’s clear I’m aiming for something with one strip of silk over each shoulder. Some kind of apron-dress thing, to go over a blouse. Eventually I settle on a full back piece and a pair of straps in the front meeting in a V, both attached to a bottom panel shaped like a gently sloped pentagon (there is some inspiration here from Charity Shop Chic’s Georgia dress, which also gets a lot out of wide straps meeting in a V shape). I get out some old cotton sheets and cut pieces for a mockup version to customise the fit.
If the print weren’t so bold, I might worry about this starting to look like a French Toast school uniform from the 1990s. Then again, about half of my clothes do look like school uniforms (I tend to say that my personal style is about 75% preppy and 25% hippie, which started out as a joke but turned out to be accurate), so no harm done.

Once I’m done with the mockup version, I decide I’m probably going to have to line the silk pieces here anyway, and for two reasons. First, because they might not be strong enough on their own. Second, because the sides are going to be open, meaning there should be another layer here so that the backside of the print isn’t visible in the back piece). I don’t wear blue often – it has a much harder time catching my attention than most other colours do – so I don’t have much I could line this with. The options come down to this grey or a black, and I’m not thrilled about the idea of black and navy in combination, so here we go. I reuse a few of the grey pieces from the mockup, but cut new ones where need be, and also cut out all the shapes from the silk.
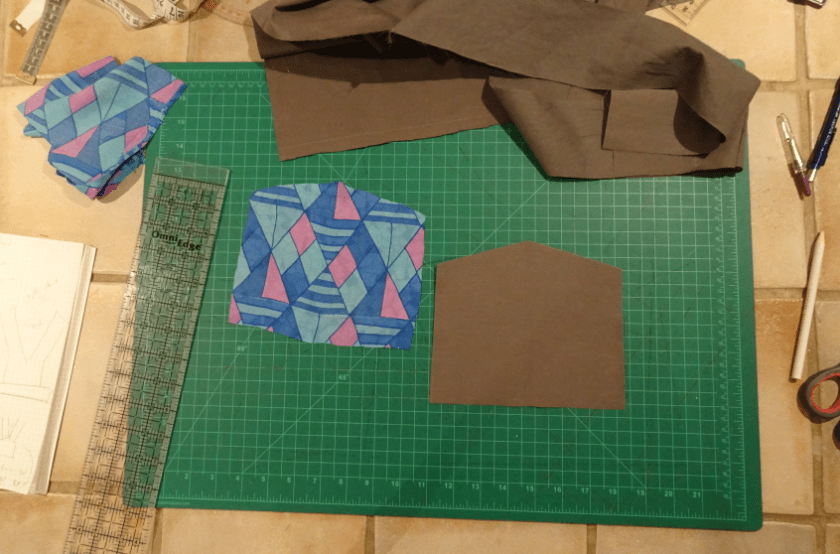
The one remaining large silk piece becomes the entire back of the top of the dress…though I think that’s what it was before.

Then I sew the straps to the back piece for the lining, and for the silk, independently, and iron the seams down. Now it’s time to attach the lining. I don’t love pins but I’m not getting away without using them here. I pin the right sides together.

Then baste.

Then draw some nice seam lines.
Time to stitch along those seam lines and finish the edges with zig zag (black doesn’t match, but odds are no one is ever going to see the inside of this again).
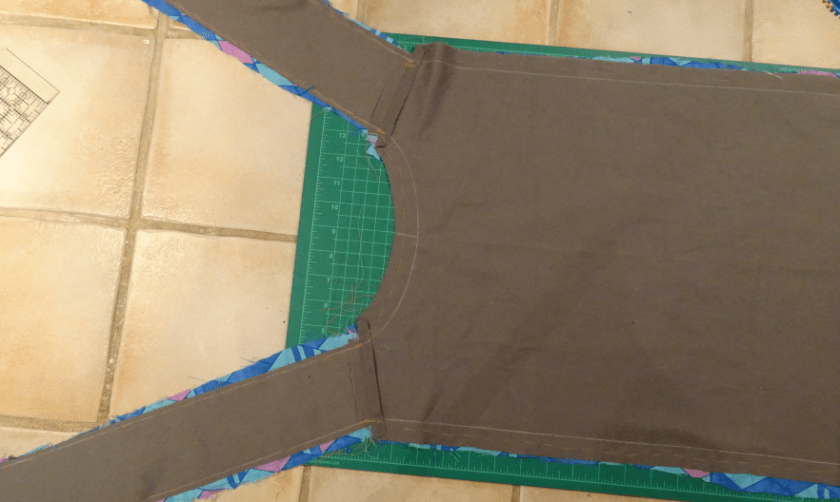
Then I turn the entire thing inside out (first the back piece, then each strap), and go to iron it – and discover that the nap on the back piece is upside down.

As noted, I did see the possibility of a nap issue coming, but either overthought it or underthought it. Not sure which. At any rate, you can see that I mistakenly matched the direction of the nap at the shoulders, which is where I should have mirror-imaged it. I take it I neglected to realise that the back piece will hang down and not up. Too late and not enough fabric to put in a substitute. Oh well. At least it’s subtle enough not to be a big problem, especially since the waistband is in the middle and turns everything 90 degrees to the side. Nonetheless, a lesson for the future.
Okay, everything is ironed down. Eventually I’m going to topstitch the heck out of the edges, but not yet. For now, time to sandwich the straps between a couple of layers of panel. This is the part where I can’t turn the entirety inside out anymore because it’s about to be attached to itself around the big hole in the middle (I do like topology, at least, and figured this out in advance). That means I need to be strategic here. We start with the bottom of the straps.

There are two pentagonal pieces.
I cut a small V out of the centre top of both, then iron down some flaps. The flaps will be facing each other, with the straps caught in the middle.
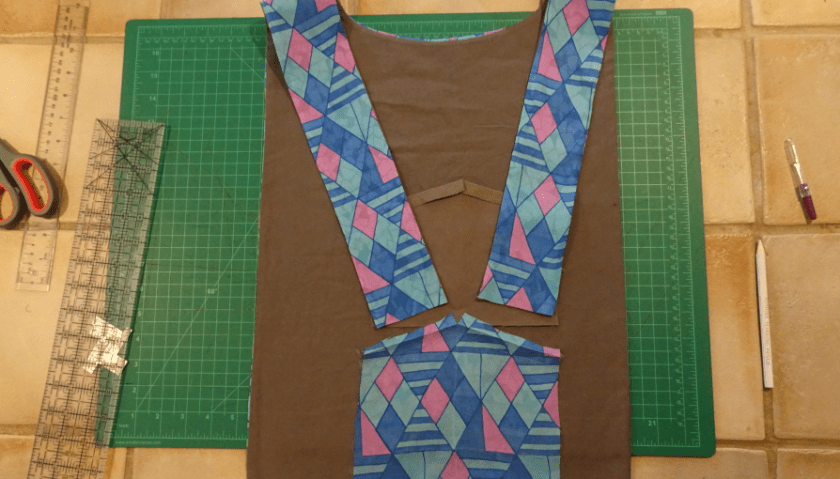
I start from the back and baste the straps down.
Then I pin the front to it and baste that down too.

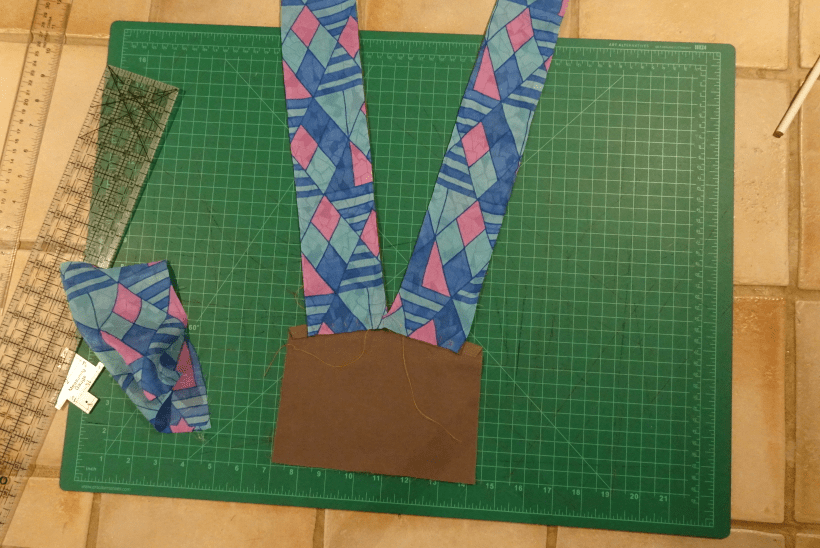
After that I draw lines for side seams of the pentagonal bit…


…fold each seam inward, baste, iron down flat, turn inside out, sew seams down. Whew! A tricky little operation here. Now it’s finally time to topstitch all the way around this entire back/front piece. I stare at the wrong marking line on my sewing machine throughout and thus everything ends up 1/4″ rather than 1/8″, but it’s not enough of a problem to go back and do it all again.

I clean up the ends of the thread, remove the basting, and hand-sew a small, tight bundle of stitches over the top of the pentagon in order to add support and discourage fraying at the point.
Now the top of this thing is all nicely lined and finished. The skirt is…not. Originally I wasn’t going to line the skirt at all – I love the drape of the silk! – but the inside of the skirt is a total freaking mess, and also my perfectionistic instincts occupy about 87% of my brain at any given time, so I’m leaning towards it.
Skirt lining would need to wait until almost the end anyway, so for now, assembly of the main components.
I baste together the two halves of the dress, both at the back and at the front, and try it on in front of the mirror, then make adjustments. Repeat about six times. The panel is off-centre, then it’s off-centre again but in the other direction, then the back isn’t lined up, then the back is calling out for darts. I do not want to put darts in this print. Instead, I change the attachment of the back of the waistband into a slight upward curve in order to compensate for a large horizontal wrinkle that keeps wanting to develop otherwise. (This doesn’t narrow the back piece – which is fine because it’s not trying to wrap around anything – but vertically speaking it does mimic the shape of the fabric post-dart-insertion.)
Now the top pieces are done and I’m back to contending with the skirt. I’m impatient because I really want to wear this already but I have to wait; the inside of the skirt is still awkward and I have decided to line it.
I measure, then pull out the roll of craft paper and cut a piece for a quarter of the lining.

I already knew I’d need compound pieces – none of the pieces of the grey fabric I had lying around were quite wide enough for something that’s (27″/2) at the bottom – but you can see here that I forgot that the vertical division wasn’t actually a fold line in this case, which meant that I neglected to add seam allowance there. I noticed immediately while cutting out the third quarter, though, and end up splitting the difference by doing all the vertical seams here at 3/16″ rather than 3/8″, which works. Barely, though. Yikes.
Then I fold the top of the lining down away from the right side and baste it into place. I only then notice I didn’t actually finish the edge, so I carefully fold it back under and run it through the machine for a zigzag. The colour match is not perfect, but this is a lining so okay.

Now it’s time to attach the lining to the skirt. I take it very slowly, starting from the zipper, working around a little at a time to put in basting stitches. The lining, it turns out, would have been a tiny bit too wide – except that the curve I put in along the back that deviates from the horizontal slightly ends up compensating. Some good luck.
I consider the zipper opening. This is an invisible zipper, and there’s a lining, so the best solution by far would be to sew only the flaps behind the lining and only the flaps behind the main piece to the zipper. This has already not happened, since I topstitched the zipper in when attaching it to the silk. It’s not obvious, but this also means that I don’t need to go to the trouble of sewing the lining to the zipper from underneath; it already isn’t that tidy on the right side – plus I have edges of only 3/16″ rather than 3/8″ to make use of there, which when I’m going in underneath is really not fantastic. So I topstitch again to attach the zipper to the lining.


At least having three lines of small stitches on the right side to the sides of the zipper means that the silk is staying flat? At any rate, I spend 20-30 minutes removing a lot of basting stitches from all around the top of the skirt and from around the zipper. I also deal with all the thread ends.

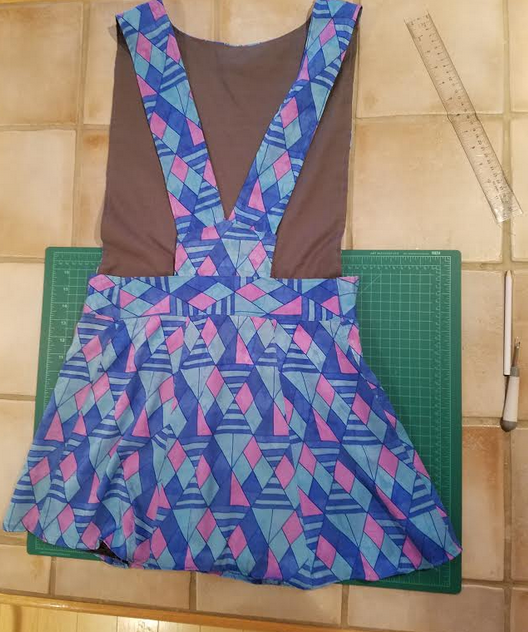
90% of the way there. Everything’s done except the bottom hem(s). I try the thing on. The straps or the anchoring bit for them at the front are about 1″ longer than they need to be – I consider moving more of the bottom of the pentagon downwards behind the waistband – but I’d rather this be slightly too big than slightly too small, and besides, I want to be able to raise my arms. So I leave it. Aside from that I’m really happy with how all this turned out! The cotton doesn’t compromise the drape of the silk nearly as badly as I’d feared, even though I made it as wide as I made the skirt at the bottom (while I like skirts otherwise, I dislike having my stride restricted by pencil skirts or small skirt liners). The cotton’s pretty unobtrusive, actually. It’s heavy enough that I’m not going to bother sewing it to the silk; it hangs fine under its own weight.
I trim the edges of the lining, then baste around the bottom of the silk, then stitch it down. It’s a little bit ruffled this way, which interferes with the drape slightly, but it also keeps it from clinging too closely to the cotton lining, so okay. Note to self: next time see if you can get the sewing machine to do a rolled hem. (Serger does, but all I have in the way of thread for that gizmo at the moment are black and white, and I don’t wear blue often enough to suspect that I’d make good use of four cones of serger thread.)
Now all I need to do is finish the bottom of the lining. I was originally going to zigzag the edge in this same blue, turn it up outwards, and sew it down, but you know what, I’m completely sick of going around and around this skirt and since it’s the lining it doesn’t really have to match. I serge the bottom in about 30 seconds in the black thread that is currently sitting on my serger, and leave it at that. We’re done!
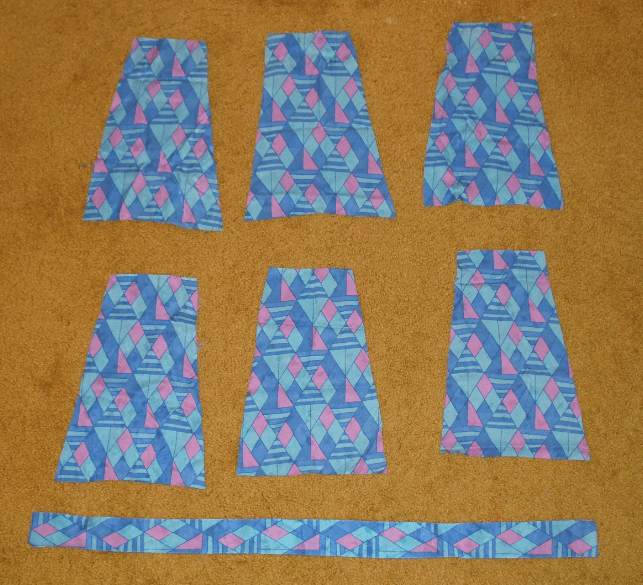
This is the pile of leftovers. I don’t know if I could even get a decent matching headband out of it. Not that it wouldn’t be overkill with a busy print.

I have no outdoor walls or railings right now. There is that one blank wall in the living room, but the lighting over there is…mediocre and lopsided. Let’s see if my (minimal) photo-editing skills can clean up the shadowy side. Okay, that’ll work!

A few minor problems, but I managed to wrestle a pile of silk, plus this is the first time I was happy with how a lining turned out. Also, I just completely love this thing. The print is slightly ridiculous but in a way I get a kick out of, and the shape is also slightly ridiculous but in a way I get a kick out of, and I basically just want to wear it all the time.
