

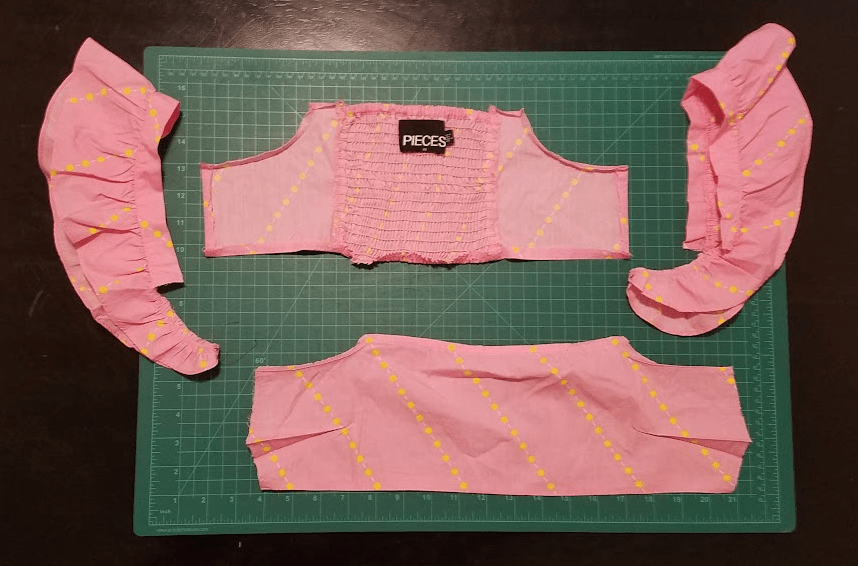
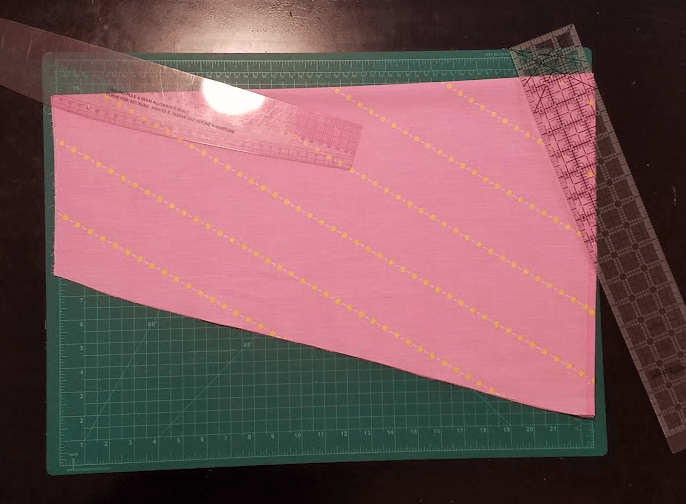
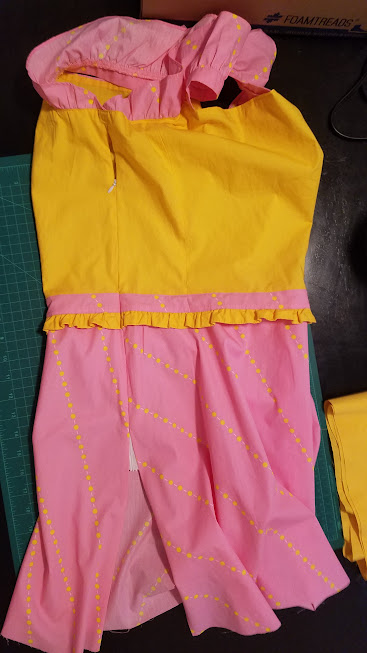
The blog has been on the move! In terms of net displacement, Behold the Thing has relocated from Ontario to Nova Scotia, but in the meantime we scratched the travel itch by running around England for a while (as if trying to imitate Charity Shop Chic even more than we already have). Sewing Machine #1 (2013-2024) did not quite survive all this, so we took it to electronics recycling and waited until our return to buy another machine of the exact same model (Janome Sewist 625E). It must be admitted that in the meantime we did nothing to stop the flow of potential refashion projects into the house. The above, for instance, is a little cotton sundress that I grabbed off a bargain rack at a TKMaxx in the autumn of 2023 for £4. At the time, it was intact and new with tags, but I accidentally deleted the photos I took of it before I detached the gathered skirt. This is why, in the picture above, it’s been hastily safety-pinned back together. (In my defense, the label says ‘Pieces’, but it came with only one of those.) I was able to get the dress on in its default state, but the cut of it is way off relative to my physical dimensions. The vertical span of the bodice is barely adequate, for one thing. For another, my body has a long torso and this dress has none whatsoever. Empire-waisted dresses on me are not a good idea. However, I love the print (pink with diagonal chains of little yellow circles), and the ruffles on the sleeves are wonderful. I’d like to save those. Decision: introduce a second fabric – some bright yellow cotton matching the polka dots – for a new bodice, and maybe also a flounce around the bottom of the skirt as well. Oh yes!
I go to my local fabric store and browse for yellow-ish cottons. Nothing really catches my interest. However, doing the rounds of the charity shops serendipitously yields this thing for £3 at a bargain outlet. It’s some kind of top that I wouldn’t wear like this, but is exactly what I need for the project. It’s just a rectangle of cotton fabric with two lines of elastic at the top. The combination of that and some pink thread (£3) and some yellow thread (£2, because I bought less of it) means we have all the supplies we should need here.
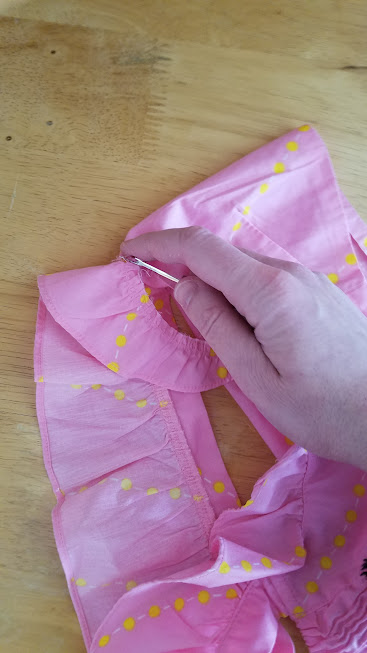
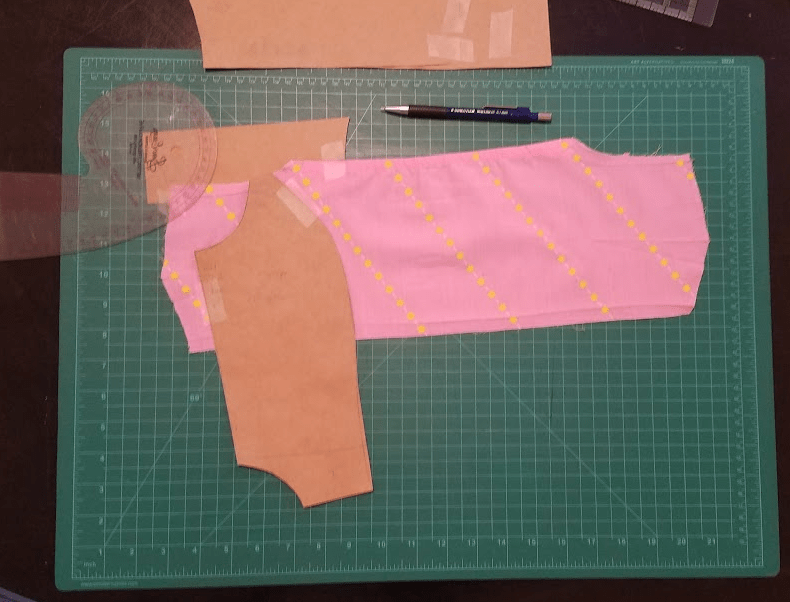
The old bodice of the pink dress has some shirring around the back, which I don’t care about at all.

Plan instead: detach the straps, set them aside, and use the rest as the start of pattern pieces for a new yellow bodice with much more vertical extent (and a side zipper). Then, reshape skirt to match and add flounce.
Okay, disassembly time! I leave the ruffles attached to the straps, but remove those from the bodice. Then I take apart the bodice’s little side seams.
This yields just what the label promised. Good thing I’m a refashioner!
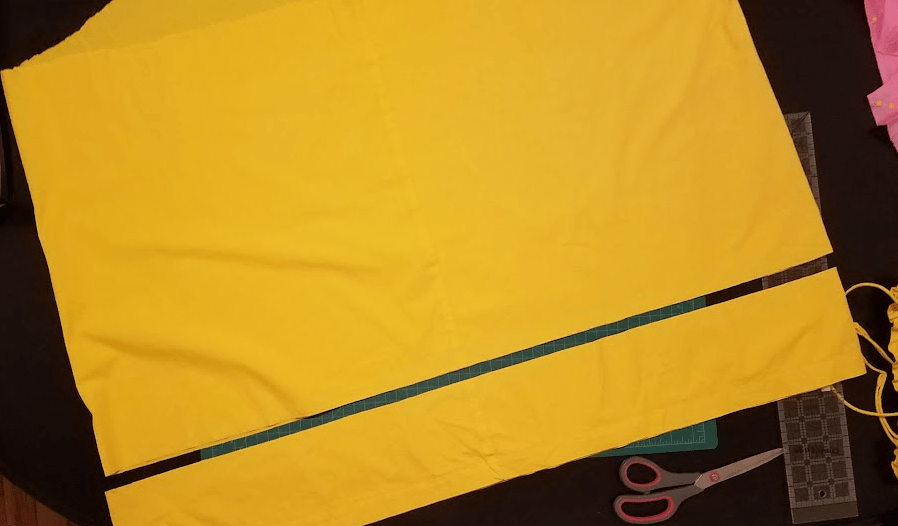
As for the yellow thing, I just cut off the elastic, then iron what turns out to be a truly impressive amount of fabric for a cotton tunic labelled ‘medium’. (To the point that I wonder whether it was meant as pregnancy-wear.) Before I go any further, I decide to carefully cut off the bottom and save it for the flounce. I measure five inches from the hem, then cut.
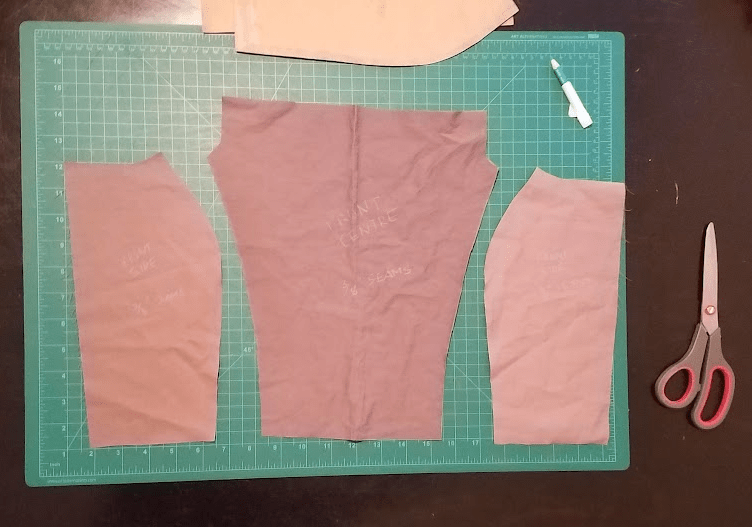
Then I spend the entirety of an evening trying to draft pattern pieces from the bodice. I dig out an old stained pillowcase and attempt a toile with princess seams. But 45 minutes of hand-basting only yields something that underwhelms me intensely. Nothing fits anywhere. The back is way too big; I don’t like the curvature; the side-seams are offset from where they should be; and I haven’t yet solved how to extend the neckline upwards by at least an inch and allow the straps to fit around the new armscyes. I sleep on it, then decide to start over. I throw out all of of yesterday’s pieces, grab a dress that fits me well, copy the princess seams (front and back!), and do my best to line up the bust and armscyes with the original pink Pieces pieces. Much tape is used and each of the new pattern pieces goes through two or three iterations.
Finally they’re looking good.

Cutting out six pieces for a second toile…
Hand-basting…

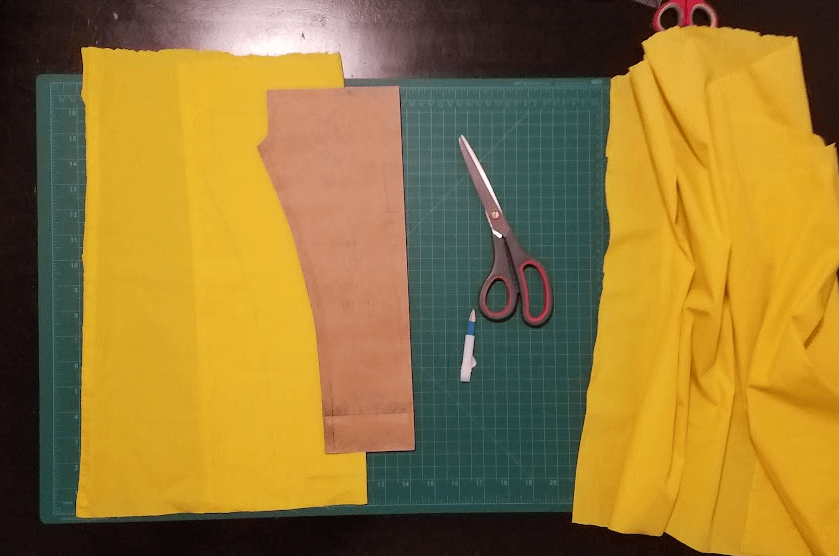
Results: YES. YES YES YES. This fits so well. Now these are my freakin’ dimensions! And the armscyes are looking good (they’re shallow and flat, but exactly as per the original dress, which is good because I have straps and ruffles to transplant onto the new bodice). The only adjustments I need to make to the pattern-pieces are at the bottoms, where (as usual for my pattern-drafting attempts) the pattern-pieces all ended up having slightly different lengths. I measure and tape extra length to all of them in varying amounts hoping to get them to match at the waist. Then I trace the pieces and cut things out on the real fabric – one of my favourite parts.
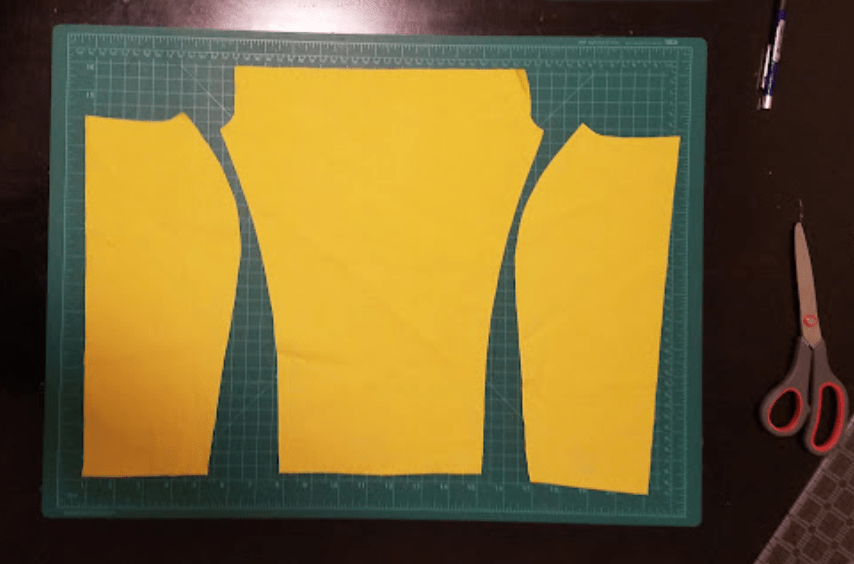
Then a lot more hand-basting. It goes well, except for the six pieces ending up even more offset at the waistline than before. In trying to lengthen all of them, I successfully did so. But in trying to get them to match lengths, I somehow made the problem noticeably worse. However, the pieces are now all longer enough that even if I cut them off at the length of the shortest piece, they should still all reach my waist no problem. That, therefore, is what I do.
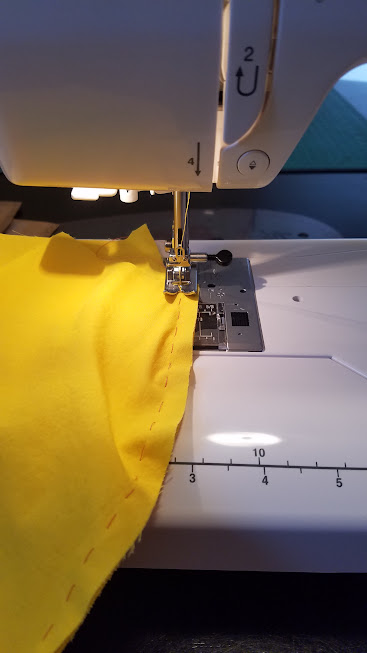
Sewing those seams down (and then zig-zagging the seams)
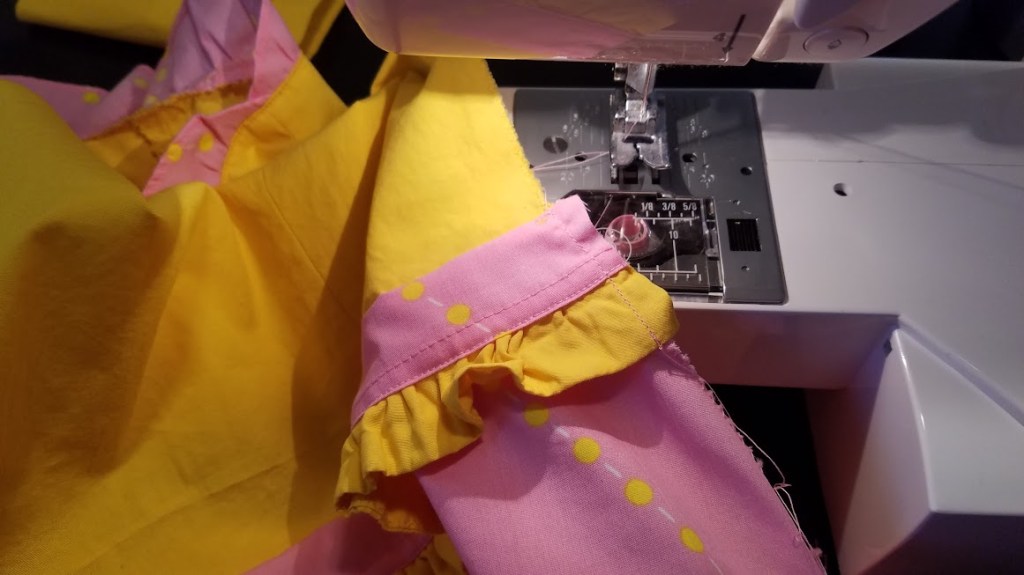
Now it’s time to attach the straps (plus ruffles).

I also decide to add a narrow stripe of the pink across the front so that the straps will be visually tied together.

Hand-basting in front of the computer…

Trying to figure out how to layer the strap and the ruffle and the new bodice and the additional stripe provides to be an unexpected pain. This is because I can’t fit the seam-allowance of the new stripe around the strap because of the attached ruffle (which I don’t want to loosen because most of it is serged in place).
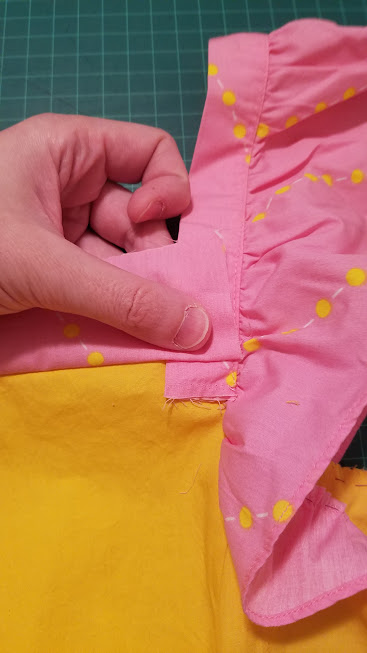
After much experimentation and a borderline headache, I end up just trimming the strap, folding over the seam allowance in two dimentions, and topstitching it on top of the strap. Then doing the same thing on the other side. This is not ideal, but I decide I can live with it.
I make sure all the seams on the inside are zig-zagged (there’s one I end up doing by hand because it’s delicate), and then trim all the thread ends.
Okay, skirt time.
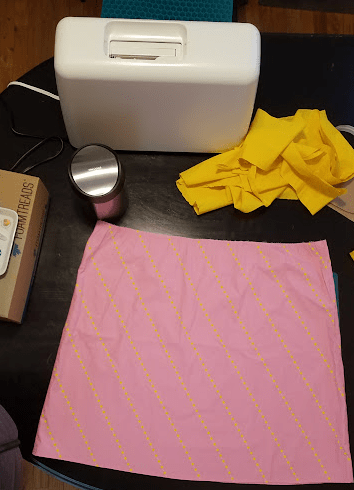
I don’t want to regather the skirt; I’d rather just cut it to be fitted. So I cut the side-seams off, iron the pieces, take some measurements, line the pieces up, and sketch out a maximally flared shape (by leaving the span at the bottom hem as wide as possible).
Then I stitch the sides and hand-baste it to the top, but I’m not happy with the results. Problems:
- I’d still like the waistline on the bodice to be an inch or two lower.
- I don’t like how the skirt is fitting. It’s currently trying to cling awkwardly to my hips and abdomen and doesn’t feel as if it has enough room.
- The bottom of the skirt isn’t quite working either. One of the corners has a notch cut out of it. I’m going to have to shorten it.
- Both of the fabrics are fun to work with and very similar in terms of texture and weight, but currently the combination is feeling a bit inert and unadventurous right now. Doing more to integrate them would make the result livelier.
For now, I do very little: just measure the bottom inch and a half of the skirt and cut it off. Beyond that, I consider all sorts of options, up to and including making a quilted checkerboard pattern with the two fabrics (it’s tempting, but my quilting skills are underdeveloped at the moment). Maybe I should cut a more dramatic curve into the top of the skirt so that it’ll flare better. Or just cut the top three inches off. Could I ruffle the piece I was saving for the bottom flounce and use it as a peplum instead? Okay, now we’re getting silly…
…or are we?
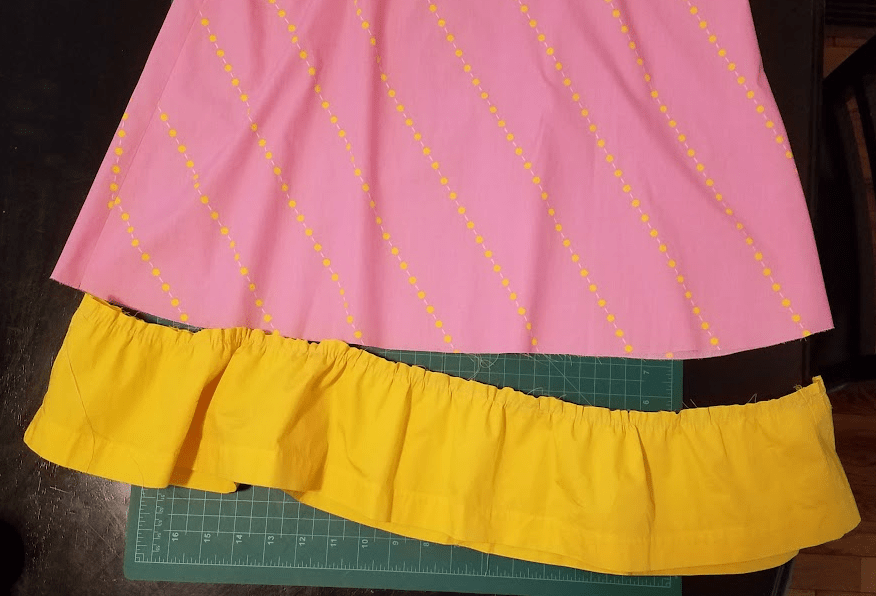
I mean, it’s true that I don’t want to use up the flounce fabric on something that isn’t the bottom hem. But what about this little yellow ruffle from the original garment? And what about the inch-and-a-half-tall pink strip from the bottom of the skirt?

Hmm. I was just going to disregard all this, but I might actually be able to play with it a bit. Let’s see. I cut off the intact yellow ruffle and try attaching it to the bottom of the pink piece. With a 1/16″ seam because there is still an elastic inside the yellow casing barely above the seam-line and I don’t want to catch it by mistake.

Oh yes! I like this. Okay. Now that the ruffle is sewn down and will stay in place, time to unpick enough of the seams around the wrong side that I can free the elastic and set it aside…

No problems. Then I cut both raw edges of the yellow edging to slightly different heights and zig-zag to tidy up the seam edge.
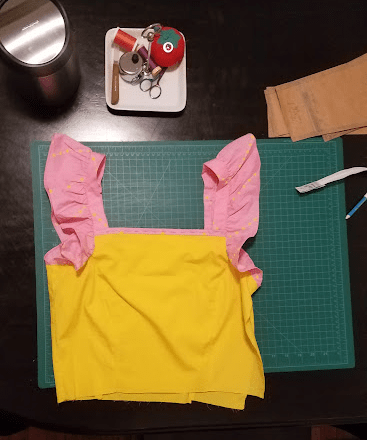
This improvised combination naturally extends the bodice downwards a little bit, so I just go ahead and sew it in and then experimentally lay the combination on top of the skirt piece. The results are beginning to look like a swimsuit, but I mean the idea is ‘semi-frilly tropical sundress’, so I can’t object.

The skirt is still being a problem until I finally compare it to some pattern pieces I have and cut a big curve down into it so that it’ll hang outwards like a circle skirt. This also means that the length of the curve all around is now a longer measure than the waistline, so I’ll have to gather it a bit.
For now, I machine-baste along the top of the skirt twice, gather the skirt a bit, attach the skirt to the waist, and clean up the seams. Then I consider whether to leave the pink strip dangling as above so that I could tie it off in a bow at the left hip. This is a fun idea for sure, but I consider and decide that there are several reasons why I shouldn’t try that. One: most of the strap is about to be sewn directly to the yellow pieces, all the way around. This isn’t going to leave enough room to tie anything. Two, goodness knows how I’d put in the zipper. Oh, and I’d have to hide the wrong side of the strip somehow, which would be a lot of extra work. Okay, no.
I accept this, trim off the excess, and go to tidy up the seam line anticipating zipper attachment.
Then I trim it further and zig-zag over each of the raw edges. These will be folded over and adjoin the invisible zipper shortly.
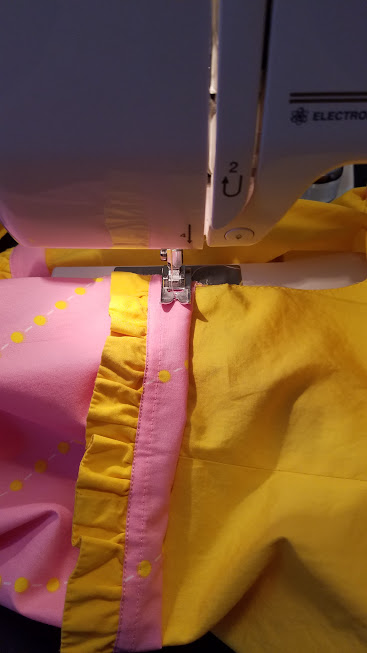
For now, I topstitch in order to hold down the waist strip (and strengthen the seam – this is where the bodice and the skirt meet. The strip and ruffle are just hanging from it).
Two things remain: zipper and bottom hem. I am still not good at putting zippers in on the machine, but at least I’ve worked out a decent way of doing it by hand?
First I baste manually. (And unpick the preliminary seam below, as the two skirt halves end up offset by about half an inch so I’ll need to redo it. Not bad, given how many changes I’ve been making.)
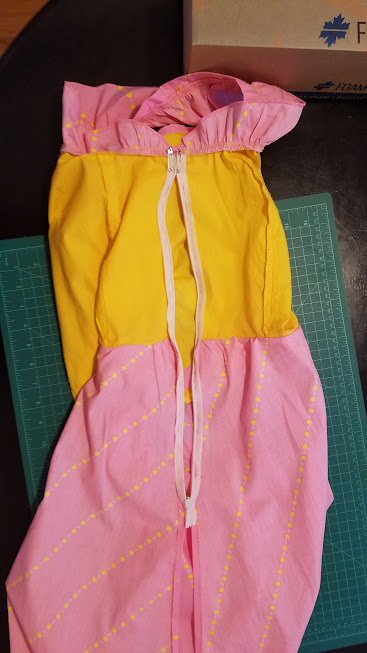
Then, one side at a time, I hold one side of the zipper open and put in a permanent running stitch very close to the zipper teeth. (This is basically exactly what a zipper-foot does, except I still haven’t mastered using it.) I also get out some extra yellow thread and put in a bunch of reinforcing stitches at the top, where the machine stitching is getting loose.
Then I close the open seam on the machine and press it. I also slip the top of the zipper under the bottom of the sleeve ruffle on the wrong side and hand-stitch it into place.

One zipper, done! Now we just need to tackle the bottom hem with the flounce. I briefly get bored and think about doing something much more ambitious for the bottom (an open lattice?), but by this point I want the project done, so I just decide to go with the original plan.
I machine-baste two rows of stitches along the top of the flounce, gather it, and use the side-seams to help distribute the gathering. Gathering/ruffling is not my favourite thing in the world – I always feel as if it isn’t mathematically precise enough for my liking. This is why, in the process of basting the slightly gathered flounce to the bottom of the dress, I end up redoing various parts of it about four times. We do eventually get there and sew it down and clean up the seam edges, but it takes a while.

Time to try it on! Do we have a finished dress?
We do not.
The problem is at the very top of the dress. Everything else fits well, but the straps are each about 2″ too long. The only way the bodice and skirt fit is if they sit higher up than the straps want.
This is tricky. I don’t want to take the straps off and make the bottoms overlap more, because that’s an enormous amount of work given how many other pieces they’re integrated with. The notion of just cutting it all off and mounting it an inch lower on the front and an inch lower on the back is not any better. I could remove 2″ at the top of the straps by folding the straps in on themselves and shortening the ruffles, but that feels like such a waste after carefully salvaging them in their intact state from the dress, plus I don’t want to have to sew up a new seam inside those ruffles, and a new seam hanging from each of my shoulders wouldn’t look very good on the wrong side, which is semi-visible given the ruffles.
I consider, frustrated.
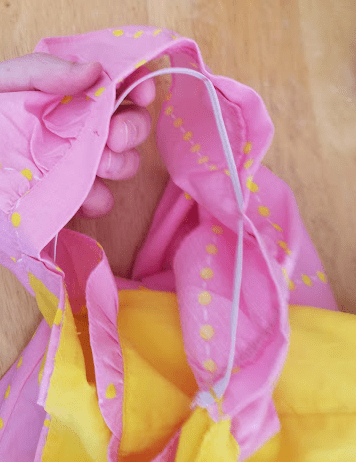
Finally, I decide to try shortening the straps by about 2″ each by elasticating them. The dress is not especially heavy, and what little weight it has is mostly being supported by the waist. The straps aren’t going to get overly stretched out if I do this, and I do want them there.
I salvage one of the two big lengths of elastic from the yellow tunic thing (hey, at least this is a footnote for the materials I refashioned), cut it in half, and securely attach it to the inside of each strap at the back.

Then the front.
It takes me a while to figure out a good plan for attaching the straps to the elastic. Ruffling it (either only on the back or throughout its length) never quite goes well. What I finally do is stretch out the elastic and put in a secure tailor’s tack at the halfway point of both elastic and strap together. Then I repeat for the quarter and three-quarters points.
That enables me to stretch it out evenly as I play a gentle game of tug-of-war with my sewing machine.

I’m not super thrilled that I had to gather the straps a bit with elastic, but it was a better solution than any of the other possibilities I thought of. And I mean, it’s not as if a bit of gathering or ruffling would be somehow out-of-place on a dress like this, where there are ruffled bits all over and most of them are from two separate original garments. And now I try on the dress and it’s basically perfect in terms of the fit. Heck yeah! The elastic has not actually made the ruffles any more ridiculous. They were already wonderfully ridiculous.
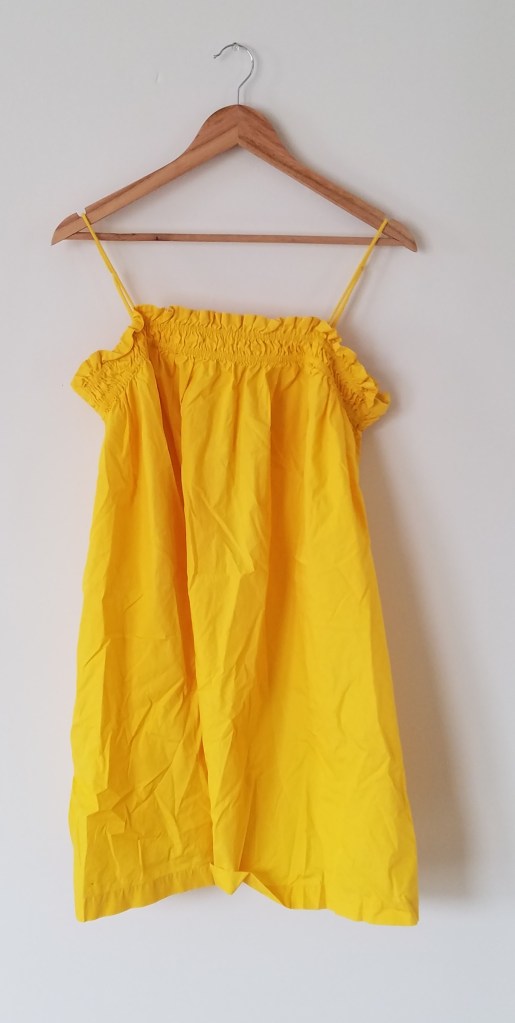
I like photos of me when other people take them but I don’t like posing for selfies and have decided I should probably just stop trying, so here’s a non-selfie and I’ll come back if I get a good photo of me wearing this. Especially if it’s July rather than March (when it is 2° C feeling like -4° C outside as I write this).
For now, please enjoy this photo of the dress sharing a wall with a lightswitch.

